Showing posts with label costume. Show all posts

Wednesday, November 25, 2009

A Most Amazing Skirt

Surfacing from my little workshop where this elf is busily making gifts to gaze in amazement at this skirt from the upcoming Alice in Wonderland remake.


Look at that! Rows upon rows of ric rac forming a lace overlay - gorgeous and perfectly insane for a Burton film. I'd love a knee-length version for myself but first I need to figure out if I'd actually wear it. Hm. But it is rather stunning and decidedly unusual. I would like to make a doll version sometime this winter, especially as the standard ric rac Joann's sells is just perfectly scaled for a 18" version of this skirt.

Saturday, October 25, 2008

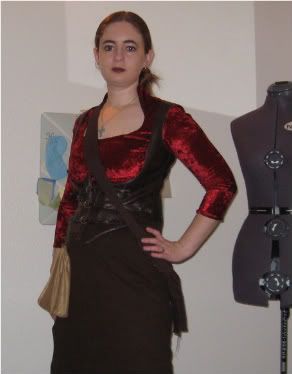
Vampire hunter costume - update 2


Nearly done!

Still need to hem the skirt and slip, take out the zipper in the right side and just make it a high slit (good idea but the fabric's just too light and the zipper's messing up the lines), and sew on the buckles for the corset. Also add a few dangling straps to hook on various accessories like garlic, holy water squirt gun, flashlight, silver knife, powdered wolfsbane (well, powdered something since real wolfsbane is poisonous and powdered random tree leaves are cheaper), another knife on a garter, and whatever else one uses to kill a vampire and any other baddies one might run across.

Also need to see where we can get a toy crossbow - I really, really want one. It'd just be such a great extra for the costume and, well, fun to play with. DH's parents were going to send his old "toy" one but it's actually a real one made for squirrel hunting. Not what I want to be playing with in a crowded party.


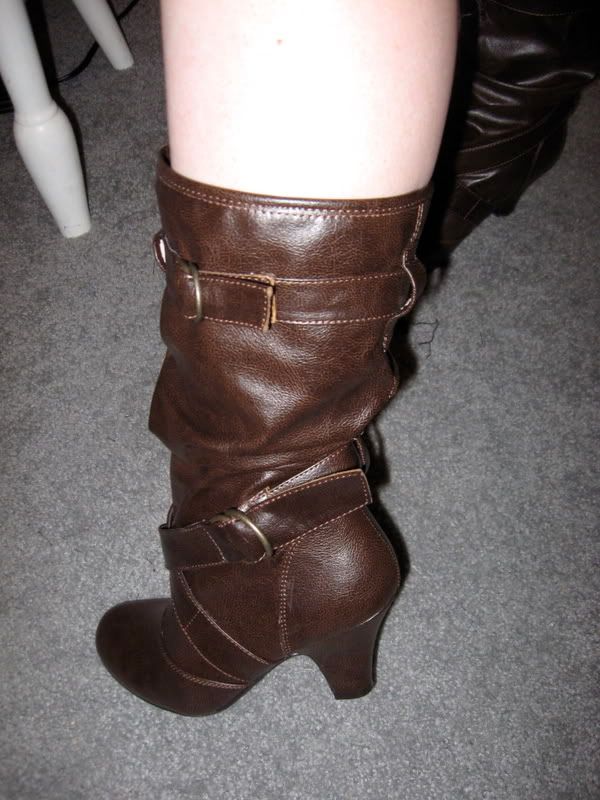
Fabulous boots from Target. Heart!


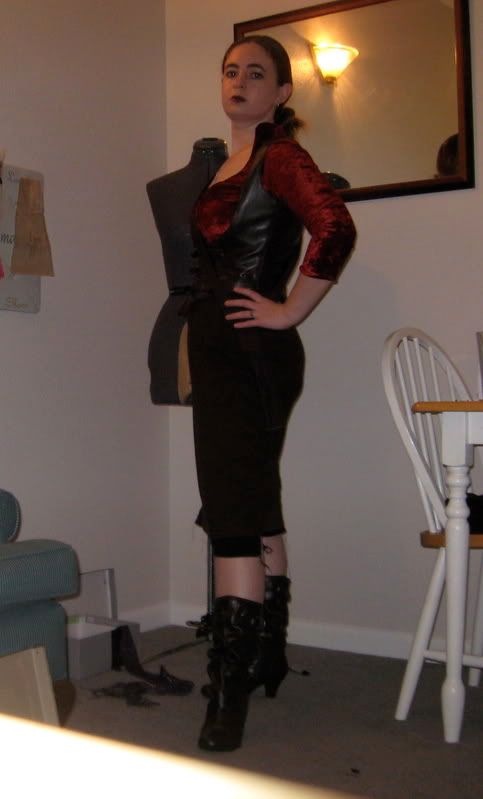
Showing off the overall line. And, yes, that's an unhemmed skirt that bothers me each time I look at the pic. Sigh. In other news, this is the first time I've used eyeliner to outline all of my eye, rather than just a thin line on the top lid. I kinda like it. Very dramatic.


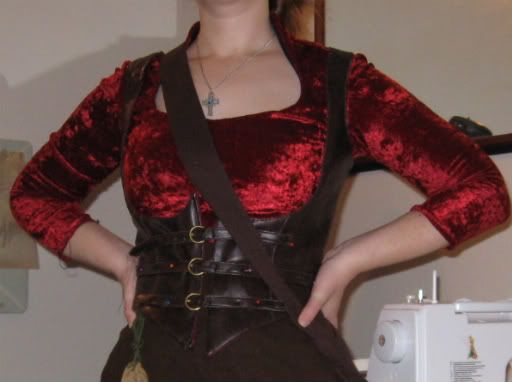
Buckles! I feel so steampunk-y.

Wednesday, October 15, 2008

Exorcist Costume

We all have heros. Some people admire those who work for world peace, like Gandi. Others idolize a particular sports hero who worked hard and overcame all odds to win. There's others who look up to a great scientist, artist, or religious figure.

My husband? He idolizes the Ghostbusters.

Yes, those Ghostbusters. Proton packs, grey jumpsuits, hearse-like car - those guys.

And now he's training for the priesthood. In a denomination where "Exorcist" is an actual position.

I'm going to be visiting a lot of strange places and people in my married life.

Good thing I have a psych background. It's hard to find people much weirder than psych profs. So I'm slightly prepared. Maybe.

Anyway, so with a Halloween Party theme like "Monster Slayer," DH is, of course, going to be some sort of exorcist/ghost hunter. And since he already has most everything he needs for exorcist... well, it was an easy choice.

Does it say anything about the friends we keep that he's going to be one of like five exorcists at the party? Sigh.

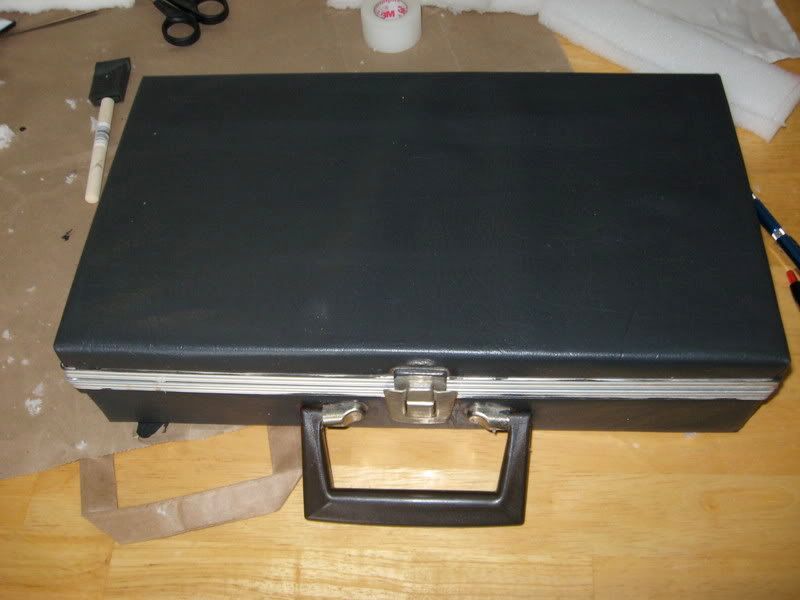
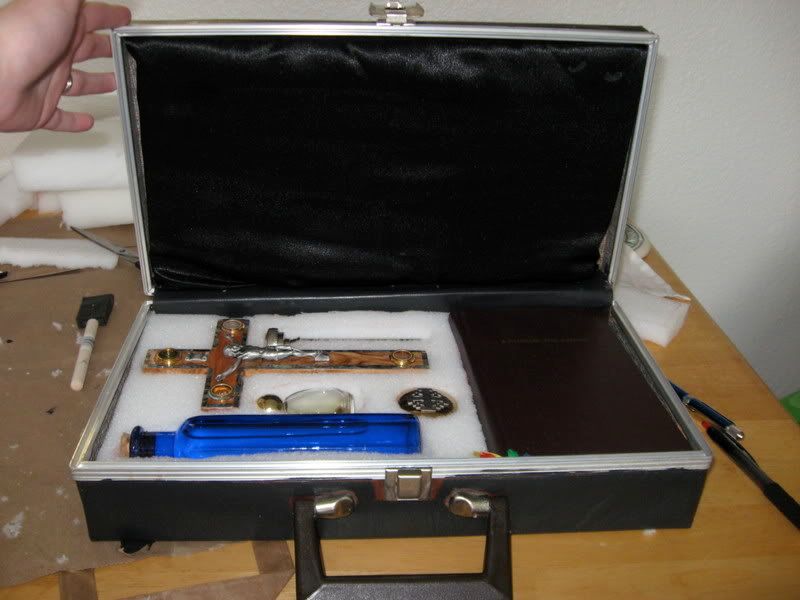
Anyway, he had the clothes and he had the props (rosary, crucifix with imbedded holy items, holy oil, holy water, prayer book) but he didn't have any sort of case to carry them in. He's been wanting something for a while but those things are expensive, especially when you want custom-cut foam to hold the items. Or so he thought. Of course, he married someone who believes nothing is too hard to DIYODS (do it your own damn self - thank you Craftster).

I found an old cassette tape carrier in the closet and pulled my collection of history lecture tapes out of it (hey, I might listen to them someday!). It was a particularly ugly light brown faux leather passed down from my grandfather. I think he got it back in the 70s for his collection of Baptist sermon tapes. I hope he's not doing any grave-rolling, I really love my grandpa. DH got some black fabric paint and went to work redoing the outside. I think it turned out quite nice.


It's actually looking nicer now since DH cleaned off the paint that got on the silver trim.

To get the inside ready, DH got foam from Michaels and, using a little saw, carved out shapes for the various items. I wasn't watching so I'm not sure how he did it but it was messy. I'm still finding little bits of foam in corners of the living room. With the foam cut I raided my stash to find some good lining. A dress I attempted to make at the beginning of my sewing career came in handy here. That was back when I hadn't quite figured out RTW size isn't sewing size. Yeah. So the pieces of black satin got shoved in a plastic bag until I found a use for them. Like, say, lining an exorcist kit.

I seriously wouldn't have foreseen that.

But it worked! Dh glued and pinned the lining into place and, voila, an exorcist kit for the price of the foam!
And I just realized these pictures are all from before he lined the bottom part and finished the detail painting. Just imagine, please.

Monday, October 13, 2008

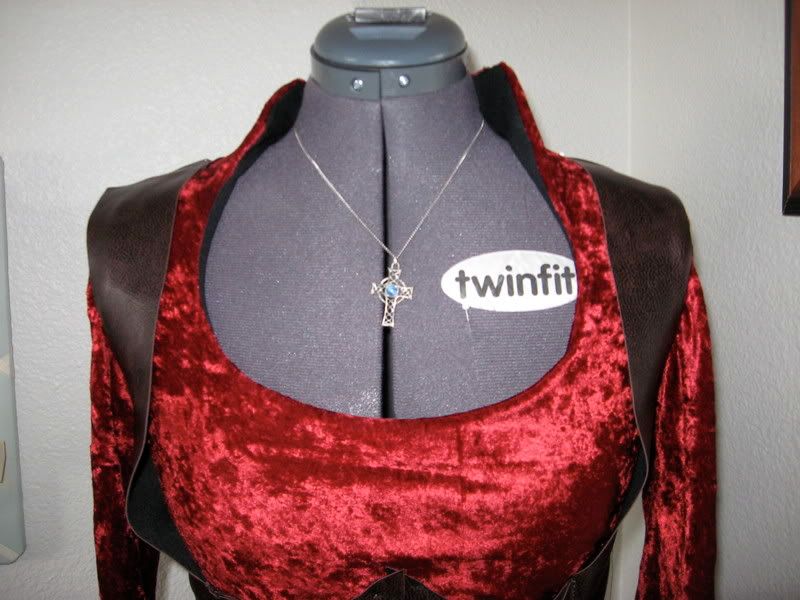
Red velvet shirt - how to

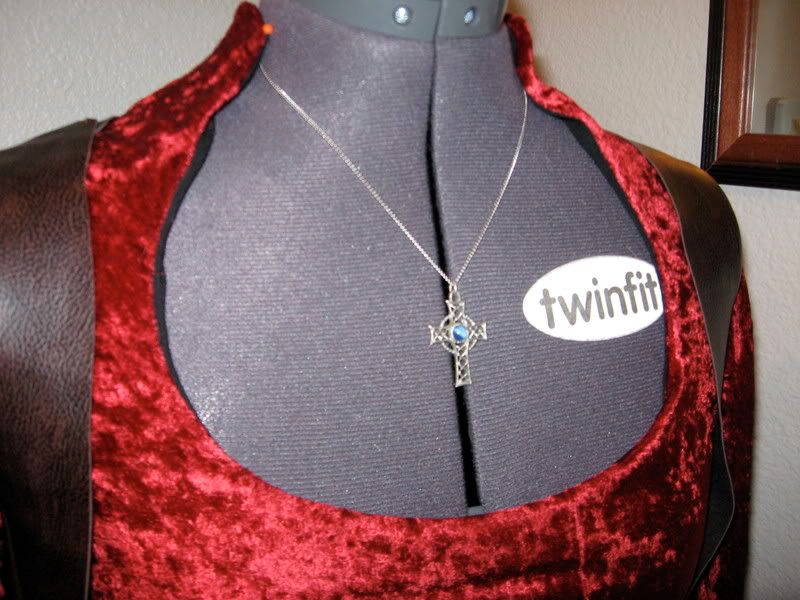
So ... how'd that red velvet shirt come together? It was easier than it looked. The original plan was for a tunic style woven shirt but then DH found this great panne velvet and it was too perfect. So new plan. Found this (moderately NSFW) drawing and really liked the neckline. Unfortunately none of my patterns quite fit the bill. So time to frankenpatten!


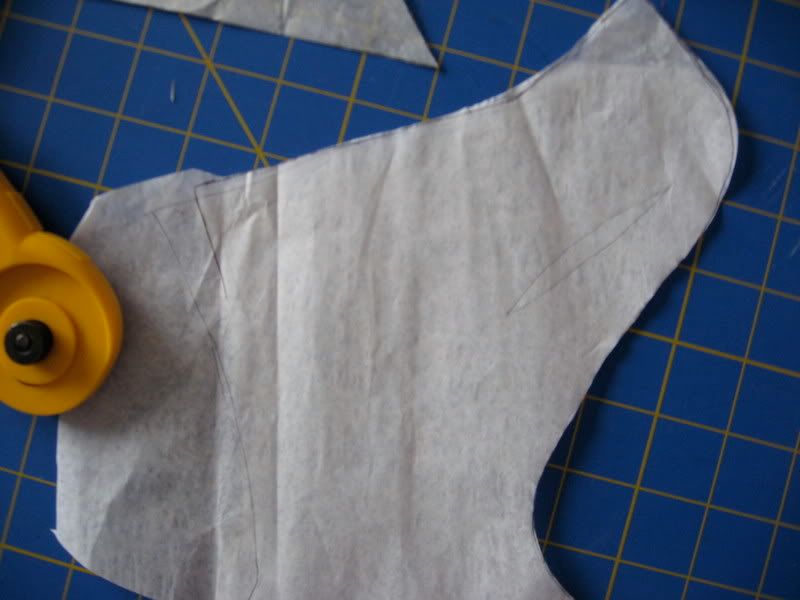
Pulled out these two patterns. The first is a knit pattern and has the body, rounded bottom of the neckline I want, and the sleeves. The second has the high neck bit. Unfortunately it's a woven, too narrow in the front (an outfit like this needs to show skin!) and has darts at the neckline. Darts, knits, and me don't mix.


Here you can see how I traced out the back. The top quarter is a tracing of the coat pattern, the rest is the knit shirt. To match up the two patterns I used the shoulder line and back center to line everything up. I pinched out the dart (it's the line down the back at a 45* angle) and raised the neckline to compensate. It was a lot of trial and error and hanging up on the dressform to get it roughly right. Good thing is it doesn't have to be perfect. Lesson learned from days working backstage - it just has to look right. It doesn't have to BE right. Sometimes those two things are actually contradictory. That's life.


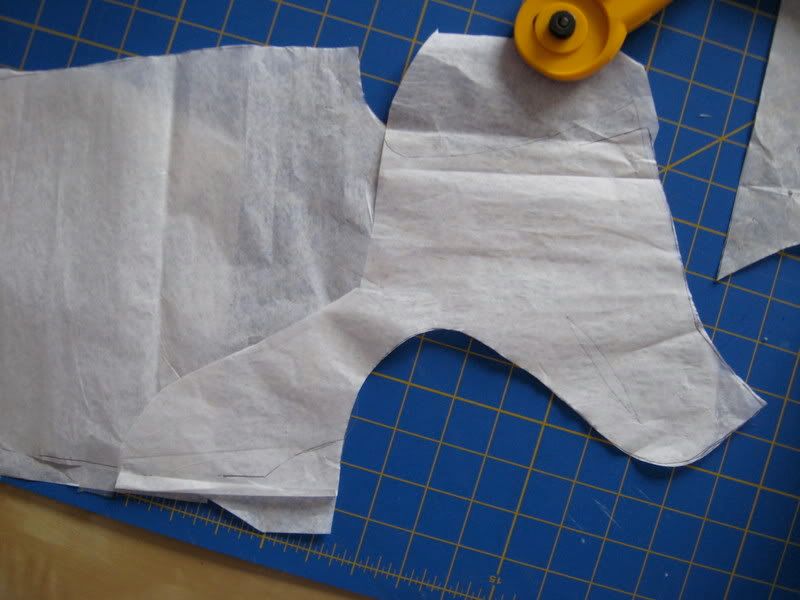
Here's the front. Again, top bit is the jacket pattern, bottom is the knit shirt. And again the center line and shoulder line were very helpful in merging the two patterns. The mandarin collar came forwards too much so I measured out just where I wanted to to be and then started drawing. I really liked how it looked so plopped it down on the red velvet and started cutting! I had plenty of extra fabric (at $2.50 a yard, it was worth getting extra!) so no reason to not go forwards with it.


A closer look at how I pinched out the front dart and increased the angle of the high neck bit. In retrospect I really need to remember about seamlines - I just drew where I wanted the finished line to be rather than 3/8" (my favorite serger seam) away. Oh well. It worked out in the end.


I sewed up the body of the red velvet, then cut up and sewed it up again in a heavy black knit. Serged the necklines together. Flipped the lining inside. Serged in the sleeves (in the round - ick) which also secured the lining. Right now I'm leaving the hems raw but I might serge them together along the bottom. We'll see.

Anyway, there's the making of one vampire hunter shirt!

Sunday, October 12, 2008

Vampire hunter costume part 1b


It just occurred to me that I should give you pictures and an explanation about that shirt pattern since it's certainly different and was fun to figure out. I'll do that first thing tomorrow.

Until then, a question that's keeping me stalled for the skirt - front slit or side?

See, I want a straight, high waist skirt for the costume on the theory that my "athletic" thighs, larger bum, and small waist present a pants fitting triathlon that's simply not in this month's to-do list. So skirt it is. And what's sexier than a pencil skirt? A high waisted pencil skirt!* And what's sexier than a high-waist pencil skirt? A high waist pencil skirt with a thigh-high zipper slit!

At least that's the theory. But now I'm stuck on just where the slit should be. I first thought of putting it in the front left princess seam but that would require adding that seam to the basic skirt garment. I don't mind drafting a new seam (heck, it'd hardly be my garment if I didn't do SOME new seams), it's the look. I tend to look broader in skirts with two front seams. But then the skirt I'm wearing right now has princess seams and it looks fine ... but it's the exception. And who's to say this new skirt will be another exception? Maybe it'll ruin the whole look. Nooooo!

So side zipper? Think that would work? Would it be too inconspicuous? Would the skirt look too office-worthy? Would the slit on just the one side throw off the skirt balance?

So many questions!!! And I'm so horrid with visualizing these things. I really need to find some fabric for a test garment but my tiny stash hasn't yielded up any volunteers. Sigh. I might just have to guess and go. Any ideas?

* Though, in truth, the high waist is mostly to keep the lines clean since it'll be hidden under the corset. But I'll FEEL sexy and that's what matters.

Vampire slayer: in progress

My vampire slayer costume is coming together fairly nicely. I spent most of yesterday tracing, cutting, and sewing (and making a huge, huge mess) and it's starting to look like a real outfit.


The shirt is some basic butterick knit shirt pattern with that fun semi-mandarin collar drafted on. It's Joann's fabulous panne velvet which remains one of my favorite fabrics for costumes. It looks so much richer than it really is and it's fantastic to sew with. Since panne velvet is pretty drapey, I underlined it with a nice workout wear weight black knit, bought years ago at Golden D'or. The collar still doesn't stand up like I want it to so I need to experiment with some interfacing. More excuses to play with fabric!

The overvest is from Simplicity 3618 and a flat measuring of the tissue pieces showed me that Simplicity, as per usual, decided the pattern needed four or five inches of ease. Because a corset is all about being loose and unsupportive. Sigh. I cut out size 6 for the back and 8 for the front and it looks just about right. I need to finish feather-stitching the seams (my machine started giving me trouble at 10 last night so I took that as a cue to put things down for the evening) and then I can sew on the lining and figure out what I want to do for the closures. The pattern calls for lacing but putting grommets in this heavy of fabric seems like a special form of torture. I was thinking about getting some buckles, ala Anna from Van Helsing. I'm a little worried about the fit of those straps. They seem alright on me but it's not exactly easy to check the fit on oneself without seams or closures and no way to pin the garment without leaving holes. Oh well. Worst case my seamripper will get a good workout.

So anyway, finishing up the corset is this afternoon's and tomorrow's task and then it's on to the pencil skirt! I'm dragging my feet on that because the fabric I'm using is just so lovely and irreplaceable that I'm having trouble cutting into it. Yes, the skirt will be wearable in my daily life and yes, I've made sure the pattern is as perfect as possible, but it's still hard to commit. Sigh.