Showing posts with label pattern review. Show all posts

Tuesday, April 14, 2009

Wearing my SWAP


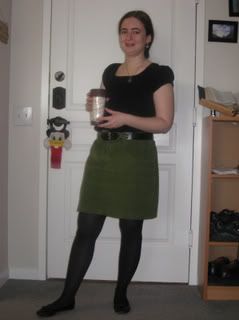
This is me yesterday on my way to class wearing shirt #5 of my SWAP and bottom #2. Or, in pattern numbers, New Look 6785 and Simplicity 3754. I really love my new black top and it wasn't hard to make at all. The pattern went together really smoothly with just the fabric itself tripping me up - it's rough crinkle cotton from Joann's and I've certainly learned a lot. The first being that while it said 45" on the bolt, that's before the crinkle process. Afterwards it's a lot less which makes a cutting layout fun. I could have ironed it out flat and cut but that would have made for some interesting distortions at the seams so I just went with the crinkle, cutting slowly and figuring any mistakes would be hidden in the fabric itself.

To keep the crinkle from uncrinkling as I sewed (since machines, by nature, really like fabric flat as it feeds) I started by with the collar since that was interfaced. First basted collar back to interfacing, keeping the fabric on the bottom as I sewed and letting the feed dogs do their thing and ease that bottom layer to fit the interfacing, and then I sewed the outside collar to the interfaced inside, again letting the feed dogs ease in the new fabric just enough to fit it. Next sewed the front and back pieces to the sleeves, going slow and decreasing the pressure on my presser foot to keep from stretching out the fabric more than absolutely necessary. Serged the seams to finish them. From there sewed the body of the dress to the neckline (treating all three layers of the neckline as one - no fussy sewing of the top layer then turning over and handsewing for this dress - it's too casual for that) and then, once I happy with it, serged the seam. Took a while because instead of gathering, I pleated in the front, sleeves, and back and it took a few tries to get the pleats just right.

Sewed little band to sleeves leaving 1" unfinished, serged the sides, then used that hanging 1" of sleeve band to cover over stitching and finish sleeves. Which probably doesn't make a lot of sense. Hm. Must think of better way to word that.

Serged hem, turned up and handstitched blind hem. Still deciding how I like it.

Anyway, wound up with a nice little tunic top that I really like! I'd like to make a few more, first in some gorgeous purple satin I have and then a few more breezy cotton versions though those I'd like to be closer to knee length - unfortunately, due to that whole not-really-45" thing I could only get a tunic out of this one. Oh, well. Great pattern, though, and I'm just about done with my SWAP!

And, best, I'm actually WEARING every part of my SWAP, so far. Well, except for the black sweater I didn't finish until it was already in the 70s here. But that doesn't count. Once it's cool it'll get worn too. So success!

SWAP Progress check

Finished
Top #1 - Black tee
Top #2 - Maroon Cowl
Top #3 - Purple knit top
Top #4 - Black cowl sweater
Top #5 - Black peasant blouse (this one!)
Bottom #1 - Denim skirt
Bottom #2 - Green cord
Bottom #3 - Black yoga pants
Bottom #4 - Black wool skirt

In Progress
Jacket - Black Coat (which is being a pain - seriously, I've ripped more seams out of this thing...)

To Start
Top #6 - Purple satin tunic

Sooooo close!

Sunday, April 12, 2009

Apron pattern review


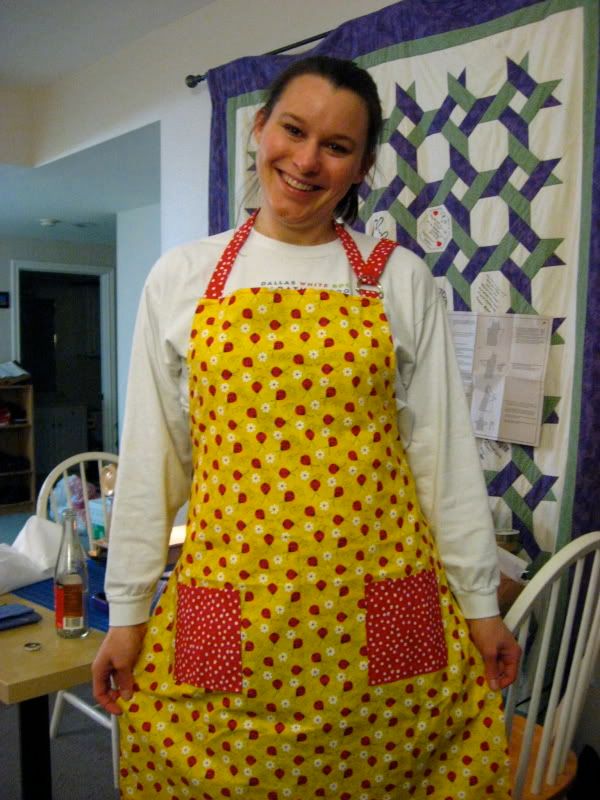
As some of you know, I teach sewing classes in my little neck of the woods. I've been having trouble finding a good pattern for my second level class for those who now know how to use their machine but need to learn to read patterns. Especially since my students are, inevitably, either pregnant or male. Seriously. I did have two who were female and not pregnant ... but they were in grade school. So the standard PJ pants bit is out (besides, I always hated those so I'm letting my bias steer me away from them) and robes just take up so much fabric. So for my latest class I tried out Simplicity 2824, a sewing for Dummies apron that's sized for both kids and women and, I figure, men can use it too. Or just suck it up and make it for someone else because, really, I'm tired of trying to work with every possible contingency. Ahem.

Anyway.

V was my only student for this class which was great for testing out a pattern. I'm still learning to read instructions as a newbie and have that bad habit of filling in instruction gaps with my own experience, something a newbie can't do. So while it looked like a good pattern, it's always helpful to have someone else who isn't used to interpreting sketchy instructions go through it. And V found some problems...

By and large it's a good pattern, very basic, very little fabric required, and very simple with a lot of the steps building on previous ones to really help the beginner learn. However if Simplicity is going to market these to total newbies (and I figure that's what the Sewing for Dummies label is targeting) then they really need to get the instructions just about perfect. Case in point: for the little tab that holds the D ring for the top strap it tells you to fold the little rectangle piece "lengthwise." Dictionary.com defines this as being along the length of a piece. Ok. Except in this case you're NOT suppose to fold it that way. You're supposed to fold it with the short edges together. And nothing beyond just looking at it and realizing that gets you the right size and shape indicates that they're wrong in the instructions. It's a small point but, when you're helping a newbie who wants to get each step just right, it's important.

Fortunately beyond that the pattern went together smoothly and V absolutely loves her new apron and was talking about other patterns she'd like to tackle so it looks like she's hooked. :)

For those considering this pattern I would recommend going with a lighter weight cotton for the ties and regular for the body - V chose the opposite and had a tough time turning the thin straps and ties inside out. And I would never try making this from heavier fabric - it'd be an utter pain to get those edges folded and sewn. For that much work I want a fancier apron to show for it!

Still, it worked out well beyond those notes and I'll be using it in the future for other second level sewing classes. And it does sew up quickly and makes a great gift for all those chefs on the list so for that it's a win. :)

Wednesday, January 28, 2009

Award and A Fun Green Skirt

Thank you Sarah for the Kreative Blog award! I'll do some indepth research this afternoon finding out if any of you creative bloggers hasn't gotten one yet and pass it on. :)


In other news, I got piece #4 of my SWAP finished! Just ... 7 more pieces to go. Gulp. Don't think about it, just keep pressing on... And fortunately the last bunch (save for the pesky jacket) should be easy. Knit yoga pants, another skirt from this pattern, a couple more cowlneck sweaters, and a handful of quick knit shirts should do it.

Anyway, the skirt.


(review copied wholesale from my Pattern Review review.)

From Simplicity 3754


Pattern Description:
A set of denim-style skirts with narrow and flared options. Different lengths and trim make the pattern very versatile.

Pattern Sizing:
True to size! Yay, simplicity!

I measure a 14 but have learned to beware of the Big 4's assumption that I like ten inches of ease in fitted stuff and so traced and pinfitted a 12. It was just this side of snug (meaning that, amazingly enough, this pattern seems to run true to size!) so I went with it but sewed 3/8" side seams, effectively giving myself an extra inch. I also, during the pinfitting stage, pinched out a bit from the back waistband and skirt and, from that, redrafted the back waistband to be a little smaller and added darts to the bottom back of the skirt, all to account for my swayback.

Did it look like the photo/drawing on the pattern envelope once you were done sewing with it?
Yes it did! I found it to be a very cute, very well designed pattern. Great job, simplicity! Granted, I would have liked to see approximate lengths of the skirts, instead of the line drawings they have with no point of reference. Ah, well, can't have everything.

Were the instructions easy to follow?
Yes, though I tended to just use them when doing something I'd never done before. Like the faux fly front. Tip: bypass their faux way of doing it and just do it the right way. I've never put in an actual fly front but I've been told it's very easy, especially when using Sandra Benzine's (did I spell that right? Credit the right person?) method. I'll do that next time since the faux fly, while looking right, feels very odd when I'm zipping it. Like I short-sheeted my zipper opening.

Another tip: the belt carriers are not too long. They look it when you just lay them flat on the waist band and they overlap by a good 1/2". That's because they need to puff out a bit to hold the belt. Lesson learned. I'll need to do a little deconstruction and fixing to get that right. My excuse - it was 2:30 in the morning when I got to that step. I'm just thankful my finger isn't a part of this skirt.

What did you particularly like or dislike about the pattern?
Great fit and style and comes together very quickly. A lot of look for a low investment. LOVE the deep pockets, very handy! And the little criss-cross belt carriers are a great detail. Dislike? The faux fly front. That's really it, everything else was and is great! Oh, and for those not sewing on an all-metal workhorse, this does have you sewing through (pauses to count) 8 layers of material at two points. My lovely vintage Singer slant-o-matic handled it without slowing down but I know my previous machine would have gone on strike, especially with this thick corduroy.

Fabric Used:
Chunky cotton corduroy from Joann's. Not the highest quality but a great, bright color and not something I was going to cry too hard over if it didn't work out.

Pattern Alterations or any design changes you made:
The pattern has you use the body fabric for all of the pattern but that would have been major bulk with this material, so I cut the pocket lining and facings out of a gorgeous bright pink and green paisley cotton. You can't see it when I wear the skirt but I know it's there and it makes me happy. I omitted the bias binding on the pocket edge - no need - and understitched and topstitched at every opportunity. For just a few minutes investment it adds a great finished look to the garment. Beyond that (and adding the back dart as described many sections ago), I actually left the pattern alone. Strange for me.

Would you sew it again? Would you recommend it to others?
In a heartbeat! This was piece #4 for the SWAP I'm working on and I still have another two bottoms to go. I'm seriously considering making this up in a longer version from some tropical weight wool I have. Very flattering, very fast to throw together (4 hours from pulling out the pattern to wearing it and that includes the 45 minutes of messing up the zipper three separate times - it'll be faster next time) and very wearable.

Conclusion:
What more can I say? It's a great, great pattern! Unfortunately Simplicity's website says it's out of print so Ebay or an understaffed Joann's might be your best bet for picking it up. Seriously what's with discontinuing such a great pattern? Ah, well, just means I'll have to keep up my habit of hording them at pattern sales.

Tuesday, November 18, 2008

SWAP Item 1 - DONE!


(me at 12:30 at night after camera difficulties. Really need better pic)

And there was much rejoicing.

So my first SWAP item, a t-shirt, wasn't exactly in my original plan. But as the idea is to sew for a week in your life and I've discovered I love a nice, fitted, tee, it made sense to incorporate one in. Then, on Sunday, I gave blood and as a thanks I got a small bottle of gatorade and a one-size-fits-none XXL t-shirt ... well, it seemed like a good time to pull Vogue 2925 out of storage and finally test out that nice shirt pattern. After all, the donor shirt was actually quite nice, black with a surprisingly non-ugly logo on it, and since it was free it made for a good test.

And it worked!

The pattern is absolutely fab, insanely quick to put together and seriously flattering. It's two pieces with four lines of gathering and I kinda cheated and put in just one line of gathering stitches at each. The less than perfect gathering really seems to fit with the slightly-off-kilter logo printed on the front. I basted the side seams together to make the next step easier, then serged those same seams. My two machines are right next to each other and already kitted in black thread so the extra step took hardly any time at all. I then fitted my sewing machine with the double needle and an extra spool of black thread and used that for the neckline, armcycs, and hem. They totally look like coverstitch hems for the price of a double needle. Heart! The armcyc was a bit hard to do this way, especially with the underarm seam. It's a lot higher and tighter than expected, probably because I couldn't do the however-big hem they wanted on it. Note for next time: cut out 1/2" deeper armcyc. Fortunately fabric rubbing off my deoderant doesn't bother me all that much but I know many people absolutely hate it so FYI.

Oh, I cut a size 10 whilst being a 14 in Vogue sizing. I like things more fitted and, since I bought the 6-8-10 sized pattern, it was the largest option I had. It's exactly as fitted as I wanted it to be (what're the chances? No complaint, though), just about form fitting but not at all binding. Just like you want an all-purpose t to be. Or I like an all-purpose t to be ... I guess I'm not all people. But there it is, a new life for a huge t-shirt! And a new shirt for me! Today, after some work, I want to get my denim skirt cut out to go with this shirt. We'll see how that goes, for now I'm just very happy to have gotten the first of the 12 items done!

Wednesday, October 08, 2008

New Shirt - Butterick 5218


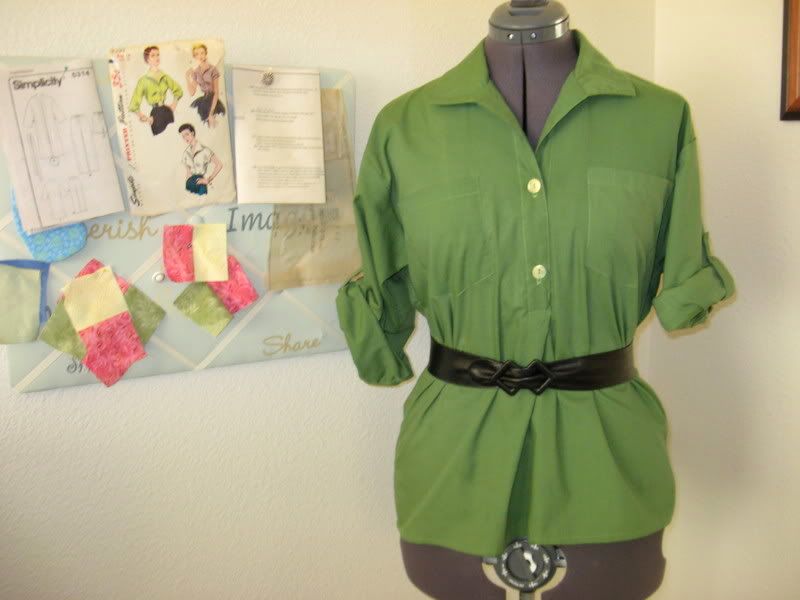
I have a new shirt! Or rather new - I finished it two and a half weeks ago. But when most of my wardrobe is older than the kids I work with, a two-week-old shirt still, comparatively, has that new garment feel to it. You know the feeling, where you're still getting used to fitting it into your wardrobe line up and it still feels a little strange (yet wonderful!) when you put it on. And the other tops look a little dingy and out of date next to it. And your black skirt that works so well with it suddenly feels new as well.

It's a great feeling.

I don't want to do the copy-paste bit from my PR review since I figure you can just click here to see it if you want to and ignore the link if you don't want. The long and short - I actually used three sizes smaller than recommended and it's still a moderately big shirt so keep that in mind. Construction and drafting were both excellent and while the pattern needs some tweaks to look high-end RTW (a standard shirt hem with the curving side vents, cuffs on the sleeves), it's a great starter piece and easy enough for a first tailored shirt project. I really had a great time with all the (added) topstitching. It's just so instant-gratification that you've gotta love it.

This was my first time doing buttonholes so that was a good bit of anxiety right there. After all, you mess up on that front placket and suddenly you're in salvage mode to save the whole thing. After, of course, you've put at least ten hours into it. Pressure? Yeah. But my new little machine did a great job! After I fiddled with it, that is. It's got some strange quirks. But I'm not sure how to explain them so I won't. It just makes me wonder what it is about me that can't have a NORMAL machine for once? Oh well. Someday. :) Until then I should be able to stay nicely dressed with the machines I have!