Sunday, September 07, 2008

Shopping list

Life is going well ... my adult ed class I'm teaching through the school starts this week and, while I'm not exactly ready, I'm also not panicked. My creative writing class is going better than I expected - I'm really enjoying the process and having an excuse to write and my ego's getting stoked a bit by my great classmates and prof. Sewing class is a lot of fun, I'm done with my regular job, and I've got a shirt in progress that's actually coming together fairly well. Unfortunately it's at that stage where it really doesn't look like much, just a collar and some pockets, so it's not photogenic. I tried taking some pictures and it looked too much like a wad of fabric to be worth posting. It's just on hold until I reassemble my new machine enough to make button holes on it. I tried on my old machine (scrap fabric, thank heavens) and realized why I avoided buttonholes for so many years. They're TERRIBLE. I don't know what the problem is but, wow, they're so very, very ugly.

So more incentive to get new machine fixed.

Until that point, J's is having Buttericks on sale soon and heaven knows I need more patterns.

On my list this time:

B5243


I'm not certain I'd get around to actually making this in this century but I love the look. One of my RTW dresses (it's from Target - shh, don't tell!) has this same shoulder treatment and it's totally fabulous. Great 40s vibe but still current. So just in case I come across a good knit, it'd be nice to have a great pattern to go with it!

B5251


I love the idea of a large, cozy cardigan for the library or classrooms. Version E is my current favorite though D's worth a try as well. And these CAN'T take that long to make, right? I also like A and B once I get past the images and start thinking - it's the collar that throws me at first. However ditch the collar and it's a really nice kimono-eque top that can be seriously chic. Nice pattern overall.

B5254


With Wisconsin just a year away I'm suddenly realizing just how unprepared I am. This isn't a super-fab coat but it's a nice one and that tube collar looks warm. Plus it'll sew up quickly with a minimum of fitting and is make for (shudder) fleece. Which means cheap, at least for poly fleece from Joann's. I know, I know. But it would buy me a little time and, really, it'd be cute. At least I think it would be ... worth a try, anyway.

B5265


Because you can never have too many costumes. Specifically nice, surprisingly accurate patterns. Look at that muff!

B5266


See above :) I LOVE that coat!

Thursday, September 04, 2008

If it's not one thing...


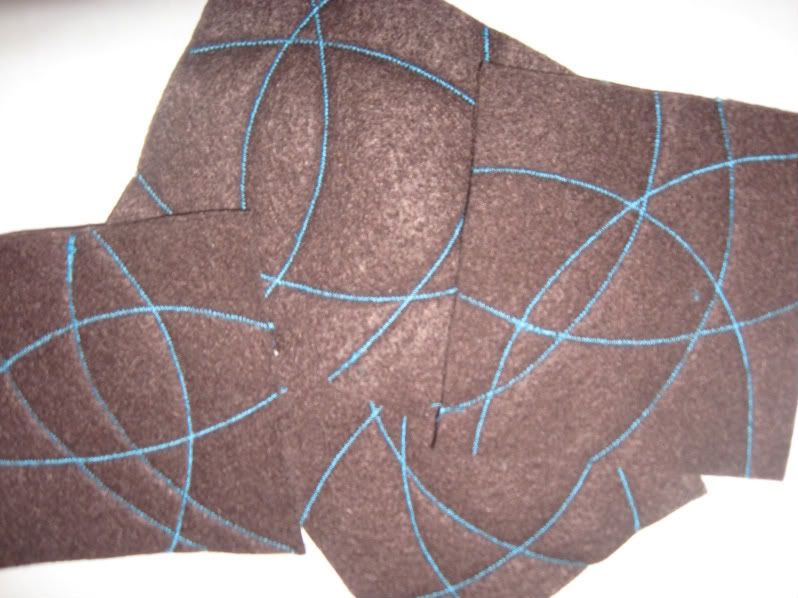
I had this grand idea of whipping up a bunch of felt coasters (among other things) and opening a little shop on Etsy. Good way to make a few extra dollars (very much needed this semester) while keeping the flexible schedule I very much need. No problem, right?

Got the felt, got the thread, practiced a bit...

Realized in practice that, of my two machines, only the Bernette can do this. My viking's pressure foot is non-adjustable and stretches out the felt too much as it sews. That's ok, the Bernette needs to earn it's keep anyway.

It doesn't agree.

To get those nice, thick lines I need a size 3 zig-zag. Fine, the Bernette goes up to 5. But therein lies the problem. It not only goes up to 5, it really, really, REALLY wants to sew 5s. And only 5s. I set to 3, start sewing and suddenly the dial spins and we're at 5. Stop, reset to 3, try again... dial spins and we're back to huge zags. Arg!

Deep breaths. See this as an opportunity ... an opportunity to pull apart the dratted thing and see how it works on the inside. I like pulling things apart and seeing how they work inside. This is good.

Whoever designed the Bernette shell does not agree. Their previous employment? Puzzle boxes. The sort where you push here to slide this lever which opens that hatch... it's the only explination for the shell design.

A half-hour later (!!!) I finally get the back off. Woot. Look inside. See this:


See also that there's no way to tighten from this angle. And the front panel is NOT coming off without doing far more dismataling of internal parts than I'm comfortable with. Seriously, there are far better places to put the screws than where they did. It's a plot. An evil plot.

I did try to delay the inevitable by attempting to jury-rig the dial with tape and a rubber band for traction. It didn't work. No duct tape in the apartment so can't try that. Not sure what else to try.

Anyway, posted problem on PR and hoping that the machine geniuses will have an idea. Sigh. Until then the machine's in pieces, the sewing on hold, and I'm out of excuses to put off some research and reading. Ick.

Tuesday, September 02, 2008

Towards a complete wardrobe

According to the standard SWAP guideline a basic wardrobe consists of 11 pieces - 1 jacket, 4 shirts, 2 tops, 2 pairs of pants, and 2 skirts. Switch out skirts for pants, tees for blouses, and a dress for any of the basics depending on need. Simple. Doable. Challenging but attainable.

So that's what Julie Culshawl, a seamstress in Australia came up with and it's been seconded by many, many others.

But what do New York fashionistas call a core wardrobe?

I pulled out my copy of the Lucky Shopping Manual (we all have our secret indulgences, this is mine) and chapter by chapter added up what they consider essentials, give or take a coat or summer skirt based on your latitide:

11 skirts
_ 2 all season work skirts
_ 1 day to night skirt
_ 2 summer work skirts
_ 1 denim skirt
_ 2 summer weekend skirts
_ 1 summer evening skirt
_ 1 winter evening skirt
_ 1 Leather or suede skirt
12 Tops
_ 2 Basic neutral color tees
_ 2 black tops
_ 4 tanks
_ 1 polo
_ 3 fun tees
15 Shirts
_ 6 work tops
_ 3 fun tops
_ 4 weekend tops
_ 2 fun tops
11 Dresses
_ 3 Summer weekend dresses
_ 1 summer evening dress
_ 1 summer daytime party dress
_ 2 summer work dresses
_ 2 winter work dresses
_ 1 winter weekend dress
_ 1 winter evening dress
7 Sweaters
_ 2 Fitted pullovers for work
_ 2 cardigans
_ 1 turtleneck
_ 2 weekend sweaters
7 jeans
_ 1 pair for heals
_ 1 pair for flats
_ 1 weekend pair
_ 1 color pair
_ 1 pair corduroys
_ 1 pair of favorite
_ 1 fun pair
9 pairs of pants
_ 3 pair winter pants
_ 3 pairs summer pants
_ 2 pair all season work pants
_ 1 pair evening pants
4 suits
_ 2 classic suits
_ 1 trendy suit
_ 1 fun suit
5 jackets
_ 2 wool blazers
_ 1 short jacket
_ 1 denim jacket
_ 1 summer blazer
8 coats
_ 1 classic coat
_ 1 parka
_ 1 spring jacket
_ 1 raincoat
_ 1 fall coat
_ 1 evening coat
_ 2 fun coats
_ 1 lightweight jacket

That's ... 90 items.

Total.

SWAPs sound so much easier now.

****************
And, because my inner logician demands it, I'll admit that there's some apple to oranges comparisons going on. A SWAP is just to get you a working, basic wardrobe to tide you over so you can add more, trendier, or more specific items. Lucky's trying to prepare you for all contingencies. Even so, this Texan girl is pretty sure that even the oddest of contingencies won't require 8 coats. Or 7 pairs of jeans. My little wardrobe would burst trying to hold them all.

Monday, August 25, 2008

Digging through the old pattern box


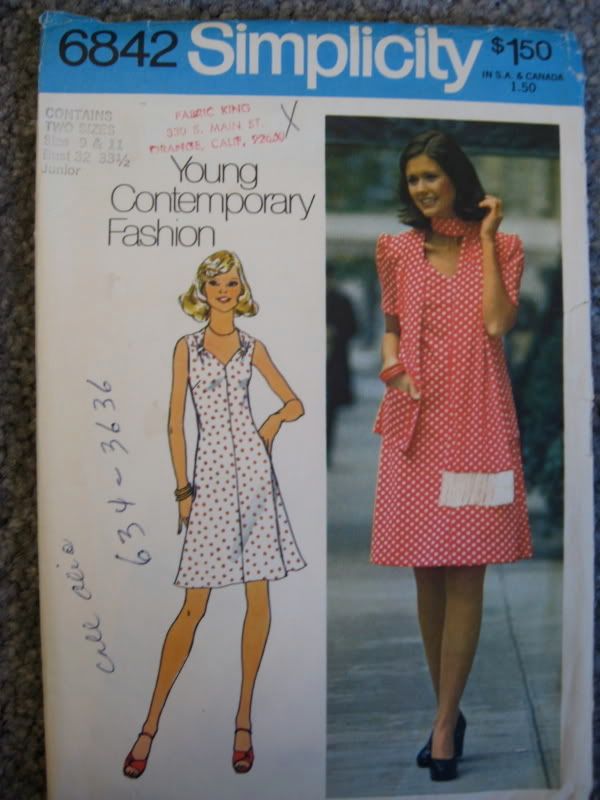
I need to dig this pattern out again - about three years ago I made it up with a stiff poly and it's pretty cute. Unfortunately it has the funny armcyce gape that all patterns seem to have on me so I have to wear a little sweater over it but still, cute. And short. See how it hits just above the knee on the model? False advertising, that. It hits a good 3" above my knee and, at 5'4" (ok, the 4" is in sneakers) I'm not exactly model material. And while 3" above the knee is hardly scandelous, it's short for me. I added some beautiful tea-stained lace to the hem and it helps me feel more modest but I still don't wear it as much as I would if it were just a liiiittle longer. But really, those are the only issues I had with this and I made it straight from the pattern, no modifications at all. So now that I know what to expect I really should try it again. Great for summer or, now that I look at it, as a cute jumper with a shirt underneath. Hm...

Oh, and this pattern comes from a group of fun 70 ones from when my mom went through a pattern collecting phase. She was living in southern California at the time and so passed on some adorable little sundress patterns. So far this is the only one of the bunch I've made but just give me time!

Sunday, August 24, 2008

Perfect in Purple


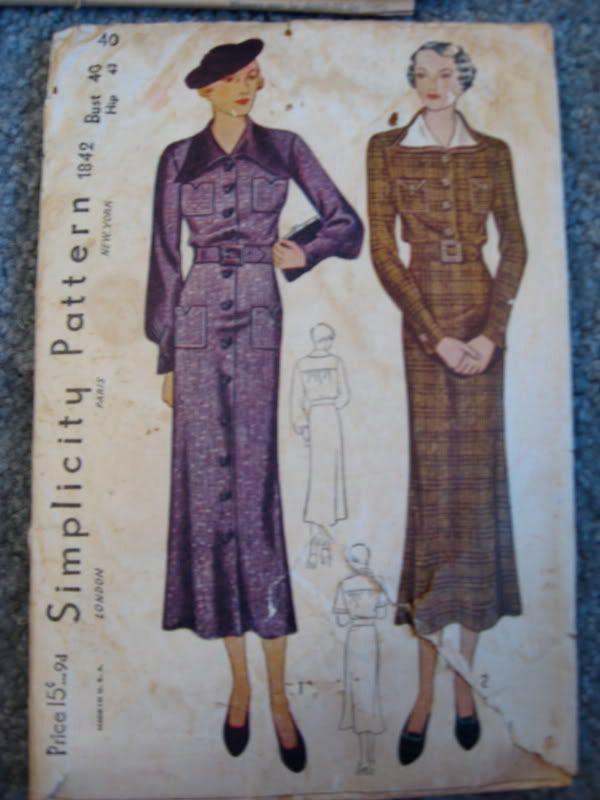
My husband's from one of those small towns where everyone went to school together and people live and die in the house they were born in. Completely foriegn to this suburban military brat! However I fell in love when DH took me to the local antique store. So many lovelies! There was a little pattern area with a number of beautiful vintage offerings. None of it was in great shape and all the patterns had obviously been well loved (and used!) but in a way that added to the fun of the hunt. This is one of the patterns I picked up because I just couldn't resist it. Look at those lovely collars! And the sleeves! Sadly it's missing a good half of it's pieces (including the lower part of those full sleeves) but, like most patterns, it shows what those peices should look like on the back of the envelope. So if I do decide to make this someday it shouldn't be impossible. Difficult, but not impossible. For now it's functioning as artwork and being fully appreciated as such. Vintage patterns are my version of jewels, I guess. Not terribly practical but they make my world more beautiful. Or something like that!

Friday, August 22, 2008

More Disney Pictures

Because I'm on a roll. Don't worry, I've got some great vintage patterns coming up next!


Hanging in the waiting area at Jungle Cruise. I love things like this.

Frontierland looking towards Big Thunder Mountain.  We never did get around to riding that last time.  No loss for me, personally.  I can get the same thrill by letting hubby drive around Dallas.  Love ya! Mean it!

Fantasyland - look at that blue sky!  It was like that all week.

The Haunted Mansion, looking only moderately creepy in the afternoon sunlight.  Should have come back at night for a shot.  Oh, well.  We went on this more times ... husband grew up watching Ghostbusters so this ride was a favorite.  Though, given the chance, he'd "plus" it with blasters and turn it into a ghost hunting game.  :)

A little washed out but I liked the sign.

Dumbo!  And God bless my grandparents for going on this ride hundreds of times with me when I was little.  What IS it with flying elephants that so enchants the 5 year old brain?

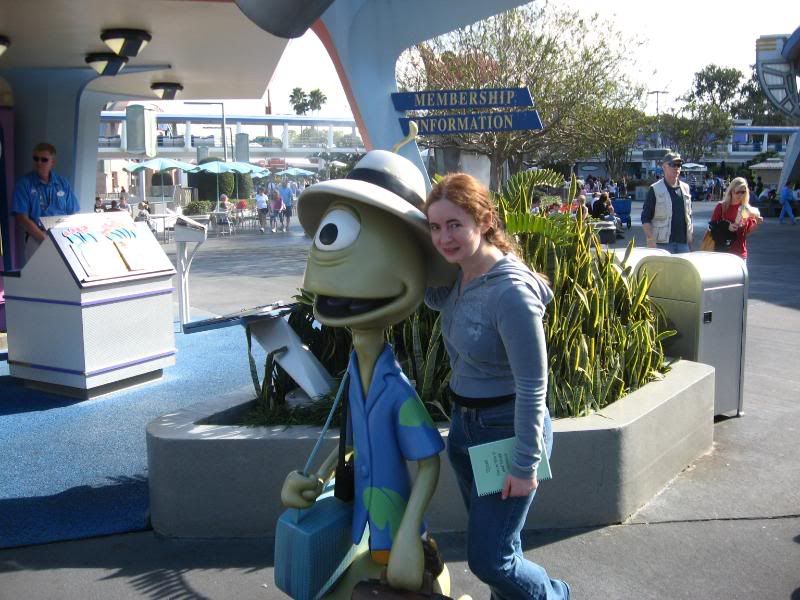
Me and Plinkley, from Lilo and Sitch.  I love the hawaiian shirt.

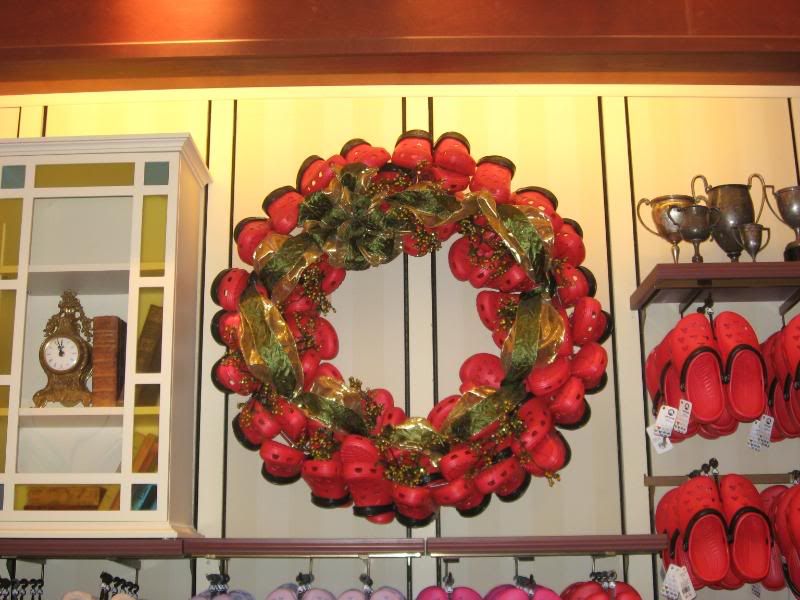
Only at Disney does a Christmas Wreath formed from red mickey crocs seem so normal...

Fantasyland in a rare moment.  An hour later it was packed.  

Looking out towards the castle from the Swiss Family Robinson Treehouse.  I really love that attraction.  Slow pace, lots of fun details, and the fun of imagining I could live there just does something for the kid in me.  This shot also shows how green the World is, even in winter.

Where in the world?

Mellie got it right!

We're in Disney World. :)

Or were in it ... not there now. Which, much as I love that place, is a good thing. Do you know how hot and crowded that place is in August? Not pleasant. Not at all.

Much prefer September, December, and April. Of course, my school also prefers those months ... for classes. Ah, well. Last trip I really made it a point to take pictures of the unexpected details. The prayer flags in Animal Kingdom's Asia, the buildings in Epcot's World Showcase, little statues tucked in odd places, and all the other little things that puts Disney's parks so far above others. I have a group of black and white photos framed on my wall and most people can't identify them as Disney. For so many people Disney means Mickey Mouse, the castle, and bright colored tackiness. There's far more ... it's just taking the time to look. And most people don't. Can't blame them, after all there's all those rides and shows and characters ... but it's worth taking the time. Also fun - going up to characters and getting your picture taken with their handler (cast member serving as body guard and time-keeper for those in costume). Confuses the heck out of the characters and makes the day of the handler!

Anyway, here's the more obvious shots that would have made the contest far too easy. :)


The Mark Twain paddleboat with Tom Sawyer's Island on the left and the Haunted Mansion in the background.


Cinderella's fountain. Look carefully at the wall behind her - that's a crown. You have to bow to her or be kid-height to get it to line up with her head. Neat trick.


My favorite. Before applying the old photo filter it was just a fairly eh photo of the castle. Kind of impressive but nothing special. However the filter really turns it into something I love. The feel of the 50s of Disneyland mixed with the grandeur of Disney World. And I think I have a Christmas present for my mom now. She'll love this. :)

Thursday, August 21, 2008

Photo contest 2


No right guesses yet, so a few more to have fun with!

Wednesday, August 20, 2008

Photo Contest

This week hasn't been a lot of fun - it's mostly been cramming for my class (the one I'm teaching - you know the one I whine about in every stinkin' blog until you must be horribly sick of it. I know I am!) and wishing I'd started earlier and finding really random ways to distract myself. I really should just disconnect from the internet. While yes, it is helpful for finding stuff I could look it up that same info in a book far faster. Heck, I could drive to four different schools' libraries and look up the information faster. And for whatever reason my laptop makes me sleepy. I can be wide awake and then, after five minutes of it on my lap I'm dropping off. Poor me. And yes, I would like some cheese with that whine, thank you very much! :)

Anyway, one fun distraction I did was take some pictures I'd shot from a trip this past year and play with them to make post cards and pictures for my aunt who graciously sponsored the trip. I thought I'd share them with you as a little break.

Also, can you guess where the photos are from? Hint: They're all from the same spot. Well, roughly. One answer will cover it all - like if I had pictures of the Lincoln Memorial, Smithsonian, and White House then "DC" would be the correct answer. No clicking on the photos since doing so will tell you the answer. Just try to guess first. :) Hard photos today, easier ones tomorrow or Friday depending on how much I need a break either day. And enjoy!


Tuesday, August 12, 2008

On the cutting table: Burda 7895


The first item for my 4-piece mini wardrobe is cut out and started on! My cold is still fighting for control so it was slow going but I knew if I didn't do SOMETHING creative I'd go crazy so, well, the skirt got cut out. I didn't have as much fabric as the pattern called for but some creative rearranging made it all fit. However after making up the lining I have a new respect for Burda's sizing - I measured myself a little more snuggly than I had in the past, saw I was a 12 by those snug measurements, cut out a 12 ... and have a snug lining. Hm. So unlike the Big4's standard, when they say a 12 fits a 36" hip they aren't kidding around. I plan on sewing with 3/8" seams and hopefully that'll give me enough extra room to keep it from looking and feeling too painted on. Of course, I AM making this out of faux suede so maybe sexy is impossible to avoid. Worst case I might be able to squeeze out two more back sides from my remaining fabric. We'll see! Another worst case is that only DH gets to see it on me and, if you ask him, that's a best case. :) So win-win.

Tuesday, August 05, 2008

Crazy week

Flew home for a short weekend, now parents are coming here and then down to a family reunion - it never stops! And on top of that DH decided he wanted to steal one of my sewing class tables for his desk and gave me his nice folding table with a drop-down part for the keyboard (PERFECT for a sewing machine) in return. Buuuuut that meant totally redoing the entire study/sewing room which left me with more room (Yay!) but also took a lot of time. Oh, well. Now both my sewing machine and serger can be out at the same time - always nice! I'll post pics of my sewing space soon, I promise. I like it. :)

So that's why I've been in radio silence mode. And why my red shirt's in the same condition it was last blog. And why it will remain like that until next month since right now I need to spend my sewing time on my wardrobe for the August contest!

Monday, July 28, 2008

Bound buttonholes!

I finally did it!  I made bound buttonholes!

This has been a goal for a couple years - my machines' four-step buttonhole looks like happy-hands-at-home at the best of times.  I've been using snaps as much as I can but there's a limit.  Especially when your snaps come from Joann's because you can never remember to just order a lifetime supply of some good snaps along with a decent snap setter.  Even more so when your Joann's has six different sizes of snaps and four different size snap setters ... but only one snap and one setter that work together.  Yes, the other five snaps cannot be put in with any of the tools Joann's sells.  And the other three snap setters have no snaps to set.

Brilliant.

So I either needed to learn how to do a bound buttonhole or get a new machine.  I'd like the second option but bank account is pointing to the first.  Oh well.  And since this pattern calls for bound buttonholes (which is looking less like a word each time I type it ... buttonholes buttonholes buttonholes) I figure it was telling me that it's time.

How'd it go?  You tell me.

First I marked up the pattern properly.  By the way, isn't that such a great looking pattern piece?  I'm really loving the styling.


Tacked on the backing fabric (or whatever the technical term for it is)


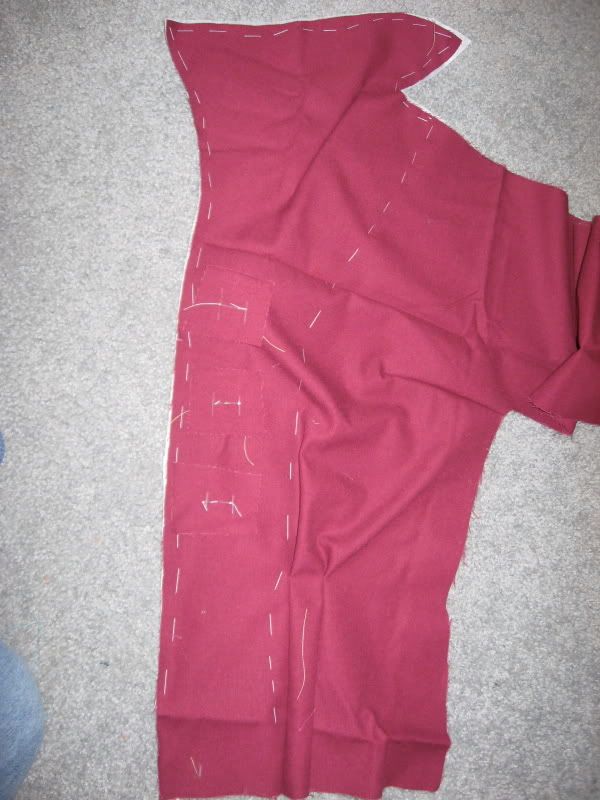
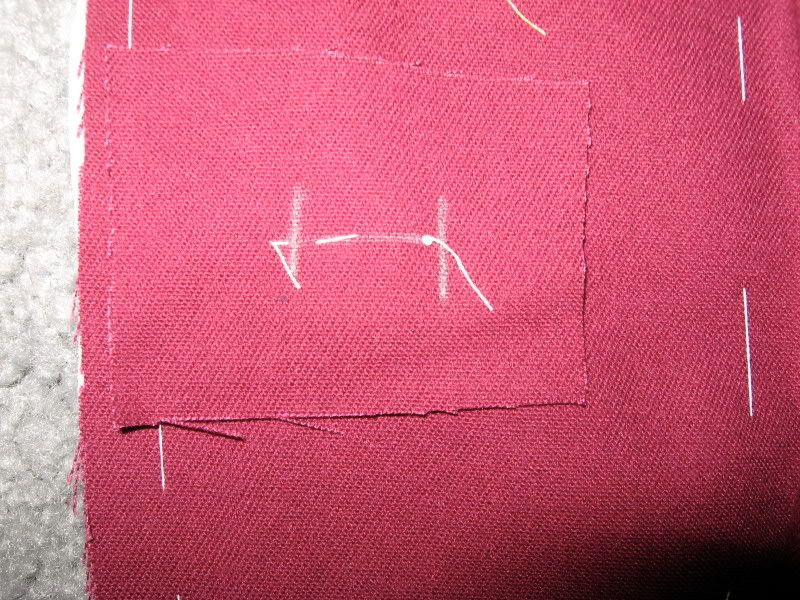
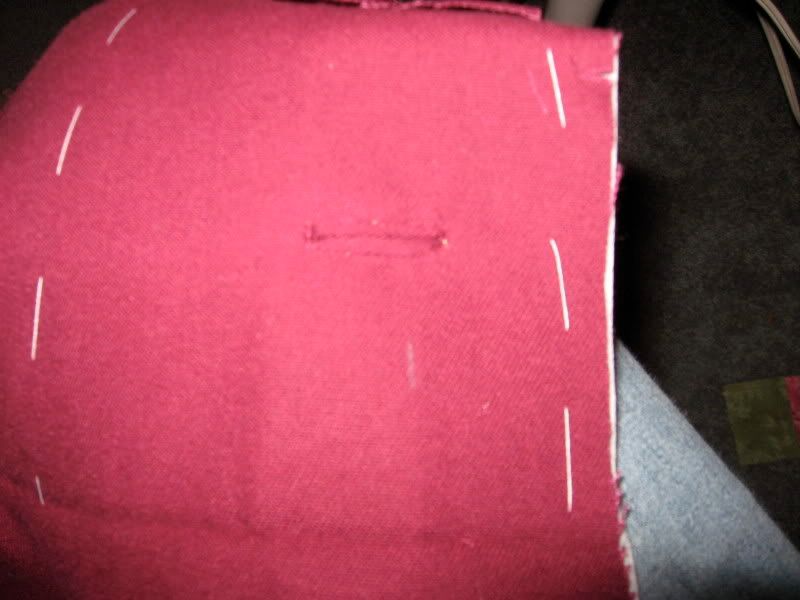
Sewed 1/8" around the line ... that was pretty tricky.  This is the wrong side of the fabric, complete with interfacing (sew in, of course).  It's hard to see the stitches on the front.

Cut along the white line (just the horizontal one) and snip in the corners.  Fold the little rectangle of fabric in through the slit and form two little piping-like bands.  Carefully hand sew because I don't trust myself to stitch in this ditch without my thread or my fabric going someplace it shouldn't.  And, while it's a little hard to see (stupid camera would NOT take a decent pic of this), it's a bound buttonhole!
All this was done following the directions in the pattern.  My favorite 40s sewing book is on loan-out and for whatever reason I didn't check my other half dozen books to see if any of them have directions.  I do want to look up other methods because this one, while not bad, didn't make the best bound buttonholes.  The edges look a little wonky to me.  But the buttons will be covering them up.  And, besides, this is a wearable muslin.  Perfection on the first try isn't bad but it doesn't give me much to aspire to in the next version, now does it?

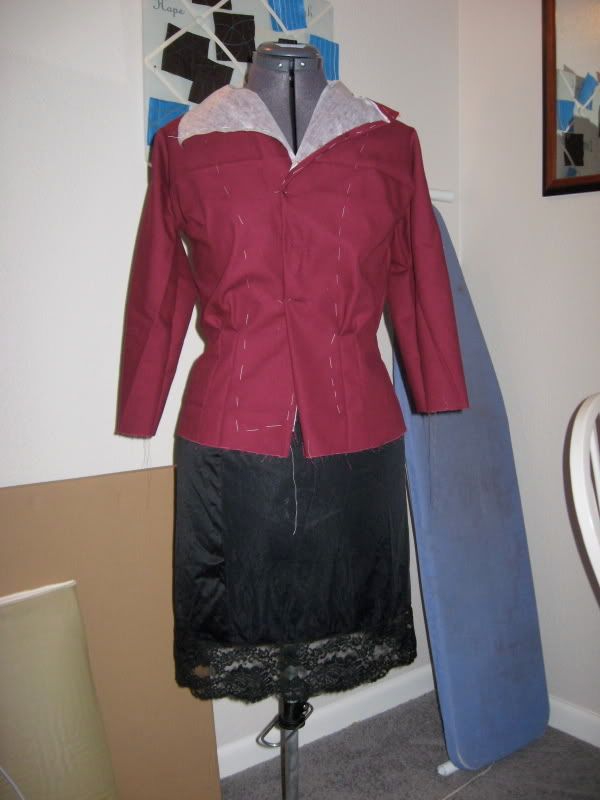
Even so, looking beyond the wrinkles (this is pre-iron), I'm really loving how this shirt (jacket? it's just heavy enough) is turning out!


Sunday, July 27, 2008

It made me laugh

Will post pics of the shirt in progress later but had to share.

We have some boys at church who enjoy the standard roughhousing stuff.  So long as no bones are broken and there's no blood, the moms have decided to let them enjoy themselves on the far side of the Great Hall.  No prob.  But today they were roughhousing more than normal.  Instead of the standard running and wrestling they were pretending to be kung-fu masters and preforming daring leaps and jumps.  Why the sudden change?

Look over.

Cute little girl watching.

Naturally.  :)

Thursday, July 24, 2008

Simplicity 116 and Wardrobe musings


or


The simplicity shirt is coming along nicely though it's surprisingly detailed for how simple it looks! The back has four tucks and each of the front panels have another two along with two darts, one of which is a tiny french dart at the collar. If you want to practice your dart skills, this is the pattern! And the pattern instructions have you finish all these BEFORE the first step. And there's five bound buttons to look forwards to. Which, oddly, I am. I've avoided buttons to this point because of how ugly my machine made ones are. So I feel like it's time to learn how to bind buttons, just to see if they're worth doing on more garments.

Looking to the wardrobe, I haven't officially joined yet because I'm not certain about the fabrics. I posted my storyboard on PR and the general reaction was positive about the patterns but iffy on the teal/tan combo. Apparently that tan faux suede was not getting any love. That worried me since I KNOW I'm horrible at color matching and so it wouldn't surprise me a bit if they really are bad together. At the same time ... I like them. So I'm trying to decide whether to switch out the tan with another dark brown or a dark denim. One person suggested navy and I like the idea of pairing it with the teal. Unfortunately I don't have any navy and I'm trying to do this entire wardrobe from stash.

Sadly, that's not hard.

Another challenge has been this button up shirt. I really like the pink fabric but I only have enough for a short sleeve shirt - and barely enough for that. I really like the longer sleeves. So what to do... I have some cambridge blue cotton/poly but it's just not jiving with the browns. Even I can see that. Maybe cream... I've got plenty of that left over from my petticoat experiment. I just need to see if the facings will show through and cheapen it. If not I'd love to do some embroidery on it to really up the elegance. Hm. I like it.

Wednesday, July 23, 2008

On the cutting table: Simplicity 116


Image curtousey of Vintage Pattern Wiki

I want to test out this pattern before August so I pulled it out of the package and laid it out on some burgundy cotton that's been aging in my stash for far too long. The fabric might be a bit thick for this pattern but, well, we'll see. Worst case this muslin will just be about getting the fit right and perfecting (or at least working on) my shirt-making skills.

Interesting tidbits - the pattern was cut out before using pinking shears on the top half and regular shears the rest of the way. Also the pattern has a square of tissue with "Use to hold small pieces" printed on it. How cool is that? Unfortunately, while the previous owner carefully preserved all the small pieces (namely the back of the neck facing and the cuffs) they didn't preserve the long sleeves after cutting them off to make the short sleeve version. Oh nos! So I laid out the pattern anyway and through measuring the little pattern piece drawings, my arm, and doing some guesstimating I drew the longer sleeves directly on the fabric using a silver fabric pencil. We'll see how good my guess was soon!

I still have the front facings to cut out but I've tailor tacked the markings on all the other pieces and should be ready to sew 'er up tomorrow. Unfortunately my entire day kinda ground to a halt due to a stupid food allergy. I'm not certain what's causing it but every so often I'll eat something with whole grains of some sort and my body will just go three sorts of angry with me. Today I had granola cereal for breakfast and I'm still being punished for it. And it wasn't even very good granola! Drat. I've spent the evening alternating between curled up on a ball in the living room and curled up in a ball in the bedroom. Not. Fun.

Hopefully all will be better tomorrow (it can't last that long, can it? It wasn't even very much granola!) and I can get back to sewing! On top of this shirt I want to make a half dozen reusable grocery bags for my mom's birthday so gotta get started on those as well!

August Wardrobe Plan pt. 2


A little more 'bout this plan...

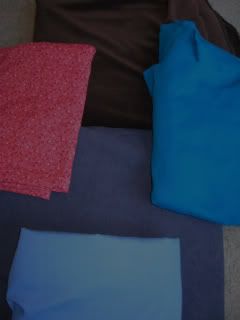
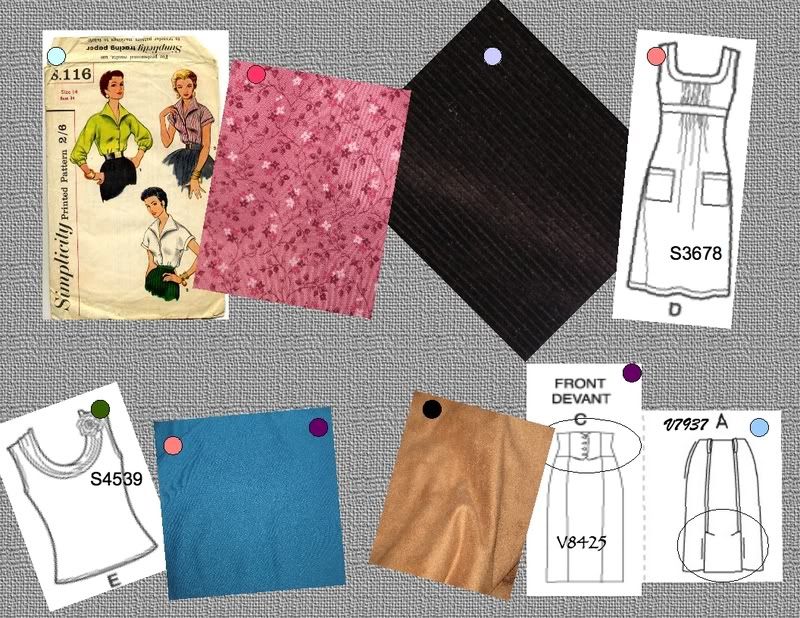
My original plan was to do some various colors with black. Because I live in black. Hey, I'm a former semi-goth from DC. Black is life. Other colors are for accessorizing. But digging through my stash I realized that I've only got a few lengths of black fabric and all of them are pretty specific. There's the workout-type black knit, the cutesy lightweight black knit with little flowers in the fabric (hey, it was $1 a yard), the black stretch velvet, the black lace ... no plain ol' black wool, suiting, or denim. I clearly need to go shopping. What I did find was brown. Lots of brown. Lots and lots and lots of brown. And a beautiful peacock blue that just lit up when it got near that brown. Hm. Maybe my stash is trying to tell me something. So I decided to listen and start pairing up fabrics with patterns. Here's what came out.

Button-Up Shirt - The pattern's an old 50s shirt that I picked up for some absurdly low price at Half-Price Books. Love that place. The fabric comes from my mom's stash and is really wonderful stuff - while I suspect she bought it in the quilting cotton section it's so soft and drapey that it deserves to be made into a nice shirt. The only problem is that it, like many fabrics from my mom's stash, didn't survive my childhood sewing attempts unscathed. A good half of the 2 yards has various shapes cut out of it along the selvages, limiting how much I can use. I THINK I can get a short-sleeve blouse out of it but we'll have to see. Oh, well. I have a cambridge blue solid shirting fabric (actually Symphony Brocade from Joann's, but I use it as shirting) that will work if the pink won't. If I must take that rout I'll probably do some cream top stitching along the collar to get my 3 colors in for the contest.

Knit Shirt - I'm so in love with this vibrant peacock blue fabric. Sadly by the time I found it there was only a yard and a little bit more left on the bolt. Sob! I brought it all home to love and care for and I think this pattern will do it justice. I want to add some elbow-length bishop sleeves (still looking for a pattern to swipe them from) but not certain I can get all that from the fabric I have. I plan on making up a wearable muslin in some purple knit that's been aging in my stash for half a decade and that'll help me see if I can do it. I'll make it work one way or another. :)

Jumper - I'm usually not a jumper fan but I figure it's time to try. Besides, I haven't found anything else to do with this odd but beautiful knit corderoy. I found it back in the sales room at Golden D'Or at something like $1 a yard and so I HAD to bring it home ... but what do you do with fabric like this? I thought maybe a skirt but the sad truth is that your average knit skirt pattern requires too much gathering at the waist to look good. Pants might have worked but that requires finding a pants pattern that doesn't look horrible on me. So when Simplicity came out with this pattern I figured I'd finally found a purpose for this fabric. Sure, they're not a perfect match - the gathers will have to be eliminated and I'm not sure how I'll do that front collar, though eliminating it and replacing it with a narrow band appeals to me at the moment. But overall it's the best fit I've found. I have some black knit to test out the fit with and hope to make that up this coming week.

Skirt - I adore the current high waist look and just have to have my own. I plan on using the top from the first Vogue (the high waisted one) and then add in the back vents from the second. That'll actually just mean making a few adjustments on the first Vogue since it's got the back princess seams already and vents are simple additions. I have a beautiful faux suede that shows up every fall at Joann's and is surprisingly easy to work with. It's got more drape than I'd really want for this look so I'll have to add a lining to smooth it out over the thighs and some underlining for the high waist to keep it up. I did just make an elven archer costume out of a green version of this fabric and it draped far better (like real suede) than I expected so I have high hopes for this one as well. And I must remember to pick up more - I have so many ideas of different suede skirts I want to make. You don't think that would label me, do you?

Tuesday, July 22, 2008

August Wardrobe Plan

It's way past my bedtime so I'll save all the details until tomorrow - for now here's a peek at my super-secret planning board. :)

Monday, July 21, 2008

Vogue 7748, part 2


DONE!

Ok, half done...

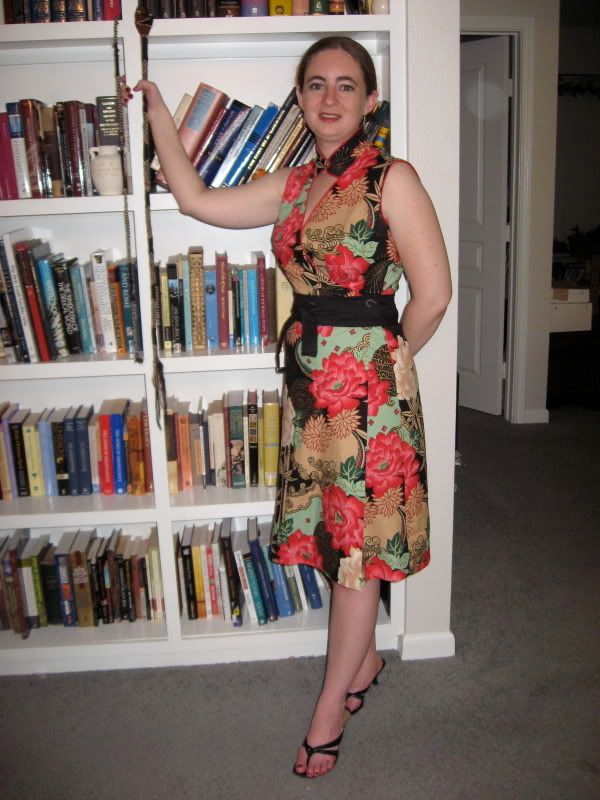
The inside still needs a good amount of work. And I'd like to line it with a nice red. And add a hook and eye to keep that front neck detail closed. And make the belt. And add a button and loop to replace the safety pins at the sides.

But besides that it's done. :) It hit the point where either the inside or the outside was going to be presentable so I chose the outside. It seemed to make the most sense.

I edged it with some red piping I had in my stash. Good to know - it takes EXACTLY one package of piping to do this. To the millimeter. Talk about cutting it close. Um, literally.

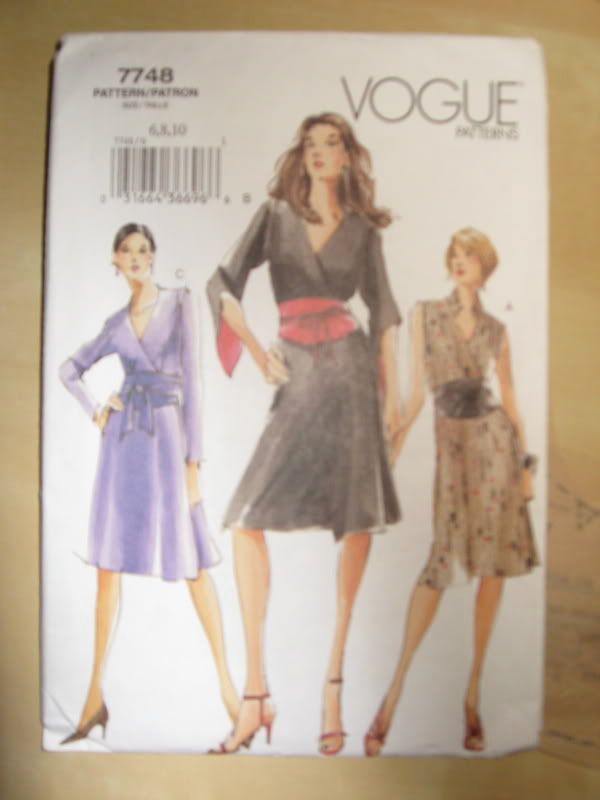
And you'll notice the collar looks a bit different than the pattern picture. Not my fault, that's totally the pattern right there. It's working on this dress but if I make it again (and the linen-look fabic at Joann's is calling to me) then I'll reduce the collar by a good inch. Maybe more. I don't particualarly like my clothing assulting my neck. But, like I said, it seems to work on this dress.

It was fun to make something like this - something a little wild and not something I can wear everyday. Or most days. Next on the list is some more practical sewing which is always easier after some impractical sewing. Today I'm rummaging through my stash to get together an entry for the mini wardrobe contest - stay tuned for that!

Thursday, July 17, 2008

Vogue 7748, part 1


The cute guy and I are celebrating our one year anniversary this weekend and I figured I needed to take the excuse to make something for myself. So a couple nights ago we sat down with my boxes of patterns and he went through and picked his five favorites. I picked this one out of those five. Usually I pick out my own clothes but with 500+ patterns I was facing paralysis so we made it a joint activity. 'Sides, he's pretty good at picking out clothes for me. :) Yeah, he's a keeper.

This is actually a pattern I had tried to make years ago just before going on a cruise and I was so tired I cut out three left bodices. No right bodices, just left. I tried to salvage it but simply couldn't and had to repurpose the fabric as a skirt and part of a top. I'm fairly proud of what I did but still, it meant this pattern got stuffed back in the envelope for the time being.

So now that I returned to the pattern I had to find fabric worthy of it. The suggested fabrics were pretty limited: crepe and linen. Great if I had planned a few weeks ahead. Not so great when my fabric sources are limited to my stash and my Joann's. Now don't get me wrong, I'm very happy with our local Joann's, but largely because I keep my expectations low. Which means not expecting any decent crepe or linen. And I was right. They had "linen look" which is half linen, half poly and all rough and not the best dyes. It's fantastic for medieval clothing because it really captures the hand-woven, hand-dyed from plants look. But that wasn't what I was going for here. Crepe? A small selection of pure poly formalwear, some of which is crepe. Again, not the look I'm going for.

So I head over to the quilting cotton, a section that's getting more of my attention each time I go there. Look what I found!


It's an Alexander Henry print and so vibrant and asian. And just $8.99, making for a $26 dress! I don't sew JUST to save money, but I love it when it works out!

I did have a dilemma, though. Should I stick with the wide skirt or should I frankenpattern this with a narrow skirt? I went to PR for the answers. Posted, checked back to see the answer ... and I got a resounding chorus of "wrong fabric!!!" Ok, so maybe I did choose a DIFFERENT fabric from the original authorial intent ... but last I checked, it's not a fabric decision that will truly make it unwearable like, say, chiffon replaced for denim in jeans. And even so, I've seen a fantastic trench coat made out of georgette so really, it's less about the pattern's requirement than understanding why and how a different choice affects it. I guess I got a little hurt that there was less praise and outright admiration of the utter brilliance of my pattern and fabric and more realistic critiques. Maybe I need to get out more. :) I did have one person wisely note that it would probably work best to sew "as-is" and then pin up the sides to see if I like the narrower look better. After all, you can always subtract fabric.

I got it all cut out tonight (and cut it all correctly!) and started sewing it up. Forgot just how much I love sewing on my old Viking! I've been using my new Bernedette and it's just not the same. Lovely, but not the same. Anyway, the skirt is fully assembled and I've got it hanging on my dress form to get all it's stretch and warp issues out before hemming it. And you know what?

I LOVE it.

The skirt definitely has volume but it works. It really works. It makes this a statement dress like boring ol' linen wouldn't. Or maybe I'm just biased. :) But it is lovely and fun, perfect for the occasion. I'll take pics tomorrow and hopefully get one of me all dressed up in it for dinner out!

Wednesday, July 16, 2008

New(-ish) McCalls

So I'm a month late noticing these. A MONTH! Used to be I'd notice new patterns within a couple of hours of their release! Sad, sad, sad. I'm loosing my touch.
And there were some nice patterns in this as well - nothing that hit my MUST HAVE YESTERDAY button but some nice ones nonetheless.

Mc5700


I really like the faux top and high waist skirt look - no fussing with a top that wants to come untucked. Plus you know that, yes, that top does go with that bottom. I have such trouble with tops and skirts not quite working together. Am I the only one? I would like this pattern better if the top had sleeves and so was a bit more work appropriate (and by work, I mean "teaching adult classes and doing research in a freezing library" so I might be unique in my needs) and I really don't get why they want you to use knits. Yes, I know it means no darts in that skirt but it also means some bulges at the hip and thigh area. And it's got a zipper. In a knit dress. The main reason I make a knit dress is to avoid zippers. Oh, well. Good idea thought I'll probably pass due to those issues. However I can still admire the thought.

Mc5705

That massive cowl is calling to me. It's so fun and crazy and overdone that I just have to like it. The dress under it is less of a like - far too 80s sack with unflattering elastic waist for my taste. But the cowl...

Mc5717

Forget the pattern, I want the green plaid fabric! Seriously, though, that's a fantastic marriage of pattern and fabric. Love the bias cut of the ruffle, it adds a great girly kick to a beautiful, classic shape.

Mc5686

Beautiful, but one question: What's the difference between this Stitch and Save pattern...


and this full-priced one?
Same necklines. Same skirts. Same sleeves. Same pockets, even. As far as I can tell the only difference is that the full-priced one has a pattern for a belt (who makes those anyway?) and the SnS one doesn't. And the full priced one came out a year earlier which probably counts for something but still... this confuses me.

Monday, July 14, 2008

Second class report

Our second class (with two students! yay!) went really well. I need to figure out a better way to do demonstrations in my cramped little living room but overall it was mostly practicing anyway. We learned how to stitch a straight seam using papers with lines on them either 1/4", 1/2", or 5/8" in. By putting the line side down you can sew up the paper and then turn it over to check how you did. It helped me discover that my little Bernedette doesn't actually have a 5/8" line on it's little metric plate. So not exactly sure what size seams I've been sewing on it. Oops! I need to put down some masking tape and make my own lines. Once I get around to getting masking tape. It's the little things that hold me up.

After working for a while on just sewing up those strips (the time flies!) I showed them the three most basic ways to start and stop seams (tying off, backstitching, and securing with tiny stitches) and was moderately gratified that both gravitated towards the tiny stitches method. It's my personal favorite, brought about from years of sewing with a machine that hates going backwards, so I felt extra good passing on that bit. After all, most places tell you to backstitch. This is like secret sewing wisdom and I get to bestow it upon my apprentices. Or something like that. Anyway, I enjoyed it. In the last bit of class we put our new knowledge to use making cute little bags and I showed them a few variants. One of my students is a total perfectionist while the others' a bit more of a DIYer and I think both really learned from making those silly, easy little bags. My perfectionist (or Debbie, named after a friend who's a perfectionist) was thrilled to finish something and liked realizing that whatever she did and whatever seam width or stitch she used, it would still be a great little bag and my DIYer liked the guidance and the fun of having one project she knows she can churn out again with confidence. Success!

It was funny that at 40 minutes into the 90 minute lesson I was getting antsy and wanted to move on, do more, teach more, cram in all the stuff I'd had planned and instead we were still working with sewing seams. And then one of the students said "you know, we've been sewing for just 40 minutes and it's amazing - I already feel so much more confident with my machine!" It really helped me to hear that - to remind myself that the goal isn't to give them a fly-over of sewing techniques (though the basics are highly helpful) but instead to get them to love and be comfortable with their machines so that when they learn the techniques they can do them without being intimidated by that scary needle or the noises or sudden movement. It's the same process I used to teach my brother to drive and, you know, he's still driving regularly and has a perfect record, despite the crazy area he lives in. So I guess my teaching method works, at least for some learners!

Both students were asking about our next class so I haven't scared them off! Highly encouraging. :) I had to get my eyes tested today and the dilation lead to a migraine so I'm sitting in a dark corner nursing it before crawling to bed. That's my excuse for not uploading pictures of the bags we made. I promise to do it soon, they really turned out nice!

Friday, July 11, 2008

Side addition

Look over to the side ------>

I've added links to the videos so they're always accessible. :) Enjoy!

I'm also on YouTube (I feel so dirty) under the name of Simply Sewing - I've only uploaded two videos for now but, hey, it's a start.

Tomorrow:
- Cut out fabric for bags, pincushions
- Find lost funnel
- Make, upload, and post videos for threading and sewing a hem

Vogue's fall stuff and a 50c alteration

A couple of them are catching my interest - a bit novel since Vogues and I have never really been best of friends. Nothing personal, we just don't have all that much in common, I guess. This season at least gives us a little bit to talk about, though. :)


V1053 - Just yesterday I was looking for a cardigan just like this. Ok, nearly like this. The front band is too high for me; I just want a cardigan with one-piece fronts that comes together in the front and is held together with a little broach. But it's an easy modification. And an easy pattern!


V8512 - TOTALLY bad for my body but I can almost feel the dress in a buttery cream wool. So soft and warm and chic.


V8512 - I'm so in love with this dress, I want a couple in each of the variations.


V8518 - I'm not a fan of the front asymmetrical pleat (not a good look on me) but that back high-waist detail intrigues me.

-----

And yesterday, after spending too long looking through the vogues, I got paid 50c for an alteration job. That and another 10c will buy a whole soda! Actually it's no where near as bad as it sounds. I've got ads up around the place for my sewing classes and so wasn't overly surprised when someone here in the building emailed me about possibly altering her bridesmaid's dress. I emailed back that I generally don't do alterations but would be willing to look at it. Yes, I know, I should have a nice little fee set up for such an occasion but I told her I'd look over it gratis for several reasons, the top most being that I'm bored of cottons and just wanted a chance to play with some nice fabric without having to buy it and do anything with it. :) So yesterday I went to her apartment and ... oh my. The dress ... was a nice color. Her sister had picked out fabric and a pattern and another relative sewed it up and ... the seams were nice. But someone definitely has never heard about things like "measuring" and "fitting." Oh, oh, oh my. The bridesmaid to be wasn't someone who could fit in a pattern straight out of the envelope but neither was she a difficult fit. And the dress was doing her no favors. Some patterns are just bad patterns. This was one of them. I can't identify the culprit but it had tiny little bust, high empire waist, and a tight skirt. It was managing to look both droopy and stripperific at the same time. And the bust area was gaping horribly while the fabric barely fit around her hips. It was bad and, sadly, she knew it. Poor thing!

I have a soft spot for abused fabric and the bridesmaids having to wear said fabric. Don't ask why, it's a painful memory involving butt flowers. Barbie pink butt flowers.

I pulled out my pins and we went to work getting the bust area to fit, the empire waist to fall at the right place, and the sides to work. A slip took care of a lot of the worst drag lines around the hips and after enough pinning it wasn't toooo bad. The bridesmaid to be was fantastic - no qualms about me treating her like a dress form, no modesty concerns (I did apologize after accidentally grabbing a boob - did I mention I don't do this alteration stuff very often?), and just a plea to make it wearable. After a lot of pinning and repinning we had something that was presentable and she's going to send it back to her mother to do the actual alterations since I'd rather not be any more responsible for the dress. In the end she insisted on paying for my pins since I did use a lot of them and I jokingly told her that I'd used all of 50c worth. So she grabbed two quarters and gave them to me. We had a great time together trading wedding stories and forming a good acquaintanceship that could turn to friendship with time so it was totally worth it to me. :)

Thursday, July 10, 2008

Sewing 101 - Lesson 1: Sewing along lines

Lesson 1 - Sewing straight lines


Lesson 1 - Pivoting while sewing


Lesson 1 - Sewing along curves

Sewing 101 - Machine Basics 1

Machine Basics 1 - Identifying some key parts of the machine


Machine Basics 1, extended edition - Identifying some key parts on other machines

Sewing 101 - Introduction Video

Introduction to our first lesson
Unfortunately my little camera's been having trouble with it's shutter - specifically, it only opens a crack without some encouragement. I filmed and refilmed this intro section four or five times and FINALLY got it right - only to realize that I'd forgotten to give the little shutters the nudge they need to open. So for all intents and purposes this intro is all audio, no video. That's not as bad as it sounds since, really, it's just me talking. Imagine me sitting somewhere (I vote for a nice tropical island or perhaps a luxury home in the mountains of California) and that'll take care of the visuals until I get over my disappointment enough to refilm this.

Wednesday, July 09, 2008

More videos!

Another couple videos - these were filmed yesterday but took FOREVER to format and upload. Well, ok, 24 hours isn't forever. But it feels like it when dealing with computers. :)

Machine Basics 1 - Identifying some key parts of the machine


Machine Basics 1, extended edition - Identifying some key parts on other machines

Tuesday, July 08, 2008

Beginning sewing video tutorials

I made up these videos in part because I could. I recently discovered the movie function on my little camera and, well, wanted to see what I could do with it. Anyway, since I'm proud of the videos I'm posting them here for others to marvel at - or at least watch if interested. :)

The three lesson videos cover the very very basics of sewing - straight lines, pivoting, and sewing along curves. In class these lessons came after a basic intro to the machine and I'd like to film that as well but then my memory card filled up and ever since I've been working on getting these videos converted, edited, and posted. To film I got both of my machines involved. My new Bernedette 55 got the spotlight (this time!) while I found that my old Viking worked fantastic as the tripod. It has two spool pegs on the back that help hold the camera at just the right angle to film. So file that under 101 alternative uses of the machine - as a tripod for a sewing show. :)

By the way, it's not easy to sew when there's a whole extra machine between you and your work. It's working for these intro sections but I might need to get a real and less obtrusive tripod and better camera before trying to sew zippers on film!

Back to the intro videos, here they are!

----

Introduction to our first lesson
Unfortunately my little camera's been having trouble with it's shutter - specifically, it only opens a crack without some encouragement. I filmed and refilmed this intro section four or five times and FINALLY got it right - only to realize that I'd forgotten to give the little shutters the nudge they need to open. So for all intents and purposes this intro is all audio, no video. That's not as bad as it sounds since, really, it's just me talking. Imagine me sitting somewhere (I vote for a nice tropical island or perhaps a luxury home in the mountains of California) and that'll take care of the visuals until I get over my disappointment enough to refilm this.


Lesson 1 - Sewing straight lines


Lesson 1 - Pivoting while sewing


Lesson 1 - Sewing along curves

Monday, July 07, 2008

First class report

First class went well! We were scheduled to have a grand total of two students (with a third joining in a few weeks) but before the class got started one called and, I think, told me she'd have to skip due to a sick baby and no sleep the past four days. It was hard to tell over the very angry, very hurt screaming of the poor little kid. I feel for both of them - it stinks to be sick and it stinks even more to be the one caring for the sick person, especially when they're so little. So we had a very personal class for my one student. :)

On the good side, I found that I'd erred on the side of preparing too much rather than too little. We spent a lot of time just sewing on lines on paper, getting used to controlling the paper, the different stitch lengths, speed control, and all that. My student's the total opposite of me insofar as sewing goes - she wanted to make sure she had each step down pat before moving on. Me? I skipped any sort of training and went straight for the fabric. Nice fabric. Nice, slippery, shiny, polyester fabric. So it was a great learning experience to teach someone so different. She seemed to enjoy it and said she felt like she learned a little more about her machine and is gaining confidence. Since we only had 90 minutes, that's pretty good! Plus she's coming back next week so that's encouraging. :) Looks like I'll be learning how to catch up one student while teaching the other. Ideally I'd just tell student #2 to sign up for the next beginner class but, ideally, she wouldn't be 33% of my class. So we're dealing with reality.

To help her catch up and as a great excuse to do something I've wanted to do for a while, I made a series of instructional sewing videos just covering the sewing-on-paper bit of the lesson. That filled up my memory card but now that I've dumped it all onto the computer I want to move on to the basics of threading the machine and sewing up the neato felt coasters. Once my molasses-speed internet connection uploads the videos to YouTube I'll put up links here so you can watch and relive your earliest sewing days. :)

Thanks for the encouragement, it's helped so much!

Tuesday, July 01, 2008

Looking ahead to Sunday

Vacation was wonderful but it's equally wonderful being home again. I feel like such a picky person but I really was growing to hate public restrooms. I'm not sure what the problem is - after all, I used squatty potties in China so I should be ok with single-ply tissue in a slightly smelly restroom that's never heard of complimentary seat liners, right? But I'm not. Oh, well.

On brighter topics, my first sewing class starts this Sunday with two students. A third will be joining a week later. Not quite the start I was hoping for but, thinking about it, I think it's just right. Since I've never taught this sort of class before this should help me get familiar with it all. Still, I'm nervous and excited all in one bundle. Eek!

Yesterday I went to Joann's to pick up the last of the materials along with extra seam rippers. When checking out the sales associate asked what I was making and my husband started to tell her about the classes. She got really excited and began asking what levels I teach, where, would I be willing to teach others ... turns out they have a good number of people coming in asking about classes and, at the moment, NO ONE teaching any. Or at least no one they know. Unfortunately they don't have any room in the store for me to teach but, for now, my apartment should work. This was highly encouraging because I need a part-time job to pay for classes next semester but, since I'll already be taking 12 hours and working another 20 as a TA, it has to be a low-hour, higher-pay job. IF teaching sewing classes works out, that should fit the bill nicely. With 4 people per class (and my apartment can hold 8) my "salary" is right at $20 an hour (including prep time) and I'll only have to teach two classes at a time to break even. Thank heavens for scholarships, otherwise I'd still be in debt even with 8 sewing classes a week.

That's it, just thought I'd share about the developments!