Sunday, March 30, 2008

Sewing Videos Online

Just thought I'd start putting all those videos I find online into a neatly organized section on the blog so I (and others!) can find them again. Because it's so annoying to spend 20 minuets googling that video when all you remember about it was that it was about sewing and absolutely fabulous.

Singer Sewing Company quicktime videos. - Lots of short videos on how to use their feet. Since one manufacturer's feet look like another's, useful to anyone who has a machine.

Threads Videos - Quicktime and Realtime. Good videos on pressing (by GorgeousThings!), a tour of a fabric store, knit neckline bindings, and a video showing Pancho Martinez do amazing embroidery with just a zigzag machine. It's not something I'll be doing any time soon (especially after watching how close his fingers get to that unguarded needle!!) but it's pure inspiration and eye candy.

That's it for now, I'll get more up later!

Wednesday, March 26, 2008

Vogue Summer 2008 - The Anime Collection

(this is totally cut-n-paste from my comments on PatternReview's message board so if it looks familiar it's not just you)

Is anyone else getting an anime vibe from this collection or was it just me? As I was looking the thought "if I ever get into cosplay I should stock up on some of these" kept going through my head.


These pants are so cute mechanic chick (helped greatly by the tank top) while the jacket with the collar up is ... someone else. Still trying to pin it down.


Sexy, but the odd (in a good way) front placket is right on the edge. Just what the mature love interest is likely to wear. Sexy but in control.


First off, love the neck treatment of the purple one. If I get into making tees I might have to pick it up just for that detail. The other two with the curves and zigzags have to be standard costume for at least a few anime characters.


Total anime or sci-fi villian. Or fan service, that works too. But you'd have to add a thigh-high slit. :)


That jacket so looks like a anime futuristic military uniform. I think it's the lapel in that color. I feel the need to add random pins and braid.


The vibe's not so strong with these but the over all asian feel still qualifies them as honorable mentions. And despite having none of the characteristics needed to pull off these pieces, I'm still tempted just because they're so totally unique.

----

Ok, that was all the seriously anime stuff I found. Still, interesting. Beyond the desire to buy for any future costume needs that may come up, I really didn't fall for anything in this line. But, well, that's standard for vogue and me. That's fine, I love the more plebian other 3 so we're good. :) I did appreciate some stuff though. For example:

Hidden under those large (but strangely attractive) tailored shirts are hollywood pants in 8502.

The dress in 8491 is so Laura Bennet with the great squarish neckline in front and v in back. Also love the many darts which make fitting easier.

8494 is one of those dresses that manages to be totally current with the beaded neckline but will still be chic many years from now.

I kinda want the Ralph Rucci shirt dress just for the instruction sheet. The halter-ish style top is bad on me but it shouldn't be impossible to take it's better parts (like that braided trim, pockets, and construction) and morph them with a shirt dress better suited for my figure.

I LOVE the new Alice+Olivia pants though I'll need to do a review dive to see what body shape they normally draft for. I'm all curves which sounds great for a 50s bombshell, not so great for fitting pants. And speaking of 50s - I like the vintage patterns they released even if I'm just so no a fan of the Dior New Look. I'm a 40s girl at heart. Fortunately Vogue already has more 40s stuff out than I can keep up with so I'm not complaining. :)

Monday, March 24, 2008

Simplicity Summer of 08

Hot off the presses and (even better) 99c at Joann's this weekend, Simplicity's Summer offerings.  Overall I liked this line.  Yes, there are a lot of bags posing as garments with various details but, well, that's the style.  Besides, after seeing so many I think they're growing on me.  Dangerous, I know.

So let's look at the looks I'll be adding to my collection and what looks really should be avoided, 99c sale or not.

Out

*crickets chirp* 

You know, no matter how hard I look I can't find any actual garment travesties in this group.  There are some I won't be adding (specifically anything with square necks or for children) but none that I can really hate.  At least in the garment devision.  However in the craft division....

A pattern for a clown.  I HATE clowns.  Scary, creepy, twisted things.  I've never really liked clowns but then there was that time at Busch Gardens when a mutant undead clown chased me through a whole forest of limping, grasping, hideous undead clowns ... I'm totally scared for life.

Bad pattern for making me relive those nightmares.  Ick.


Onto much happier thoughts...
So Hot, So Mine

1. S2941

If you know me, you know costumes are my weakness.  After all, a good, historically accurate costume just doesn't go out of style.  And they're so much more fun to wear than everyday stuff.  Sadly there just haven't been many good patterns released recently.  So it's good to see Simplicity and Andrea Schewe (my favorite designer) releasing at least this one pattern.  It's something!  And it's a something I think my husband would highly appreciate.  :)  I really like all the different pieces in the pattern though I wish they'd stop using those barbie dolls for the front and back views and switch to the nice basic line drawings they use for all their other patterns.  It's hard to see the details with those dolls.

4.  S2938

I really like the dress in this pattern, it's got that easy-breezy black dress look with just a nod to current trends with the gathered neckline.  And it's got a size zipper!  I so prefer those over back zippers as they're much easier to reach to zip up.  I always have trouble contorting myself just right to zip up those last three inches with back zippers.  In regards to the rest of the pattern, I can't say I'm a fan of the boxy hobbit jacket with just the single button.  I really don't get why I'd want a jacket with sleeves too short to keep my arms warm and a front that gapes open giving me a cold tummy.  Plus, as a pear I really don't need that tent like line making my hips look even bigger.  So a pass on that one.  The pants look nice but as pants and I don't get along I'd rather that they'd included a skirt.  Oh well.  Still, I'll buy it for the dress and that's enough for me.

3 S2940

I'm a fan of all things kimono at the moment.  It started with sewing one up for a friend's wedding present and then another and then one for myself and then, well, it kind of went from there.  I love how, with the right fabrics, one pattern can be a shirt, a jacket, a cool weekend robe, a sexy geisha robe, and, I'm sure, much more.  While I'm really pleased with the pattern I've morphed beyond recognition into my own creation, that doesn't keep me from wanting a whole slew of similar patterns to draw details from.  In this particular case I really like the sleeves and the boxy and potentially authentic lines.  And just look at that skirt!  Is it really a high waisted wrap skirt with just a hint of an obi?  I so want.

2.  S2927


Dressaday.com's getting to me, I love this pattern in part because it has pockets. I didn't used to have a thing for pockets. The buttoned collar is a great detail, giving it a nice 60s vibe and all the graceful lines look like they add nice shaping. I also like the short little sleeves, though it's driving me crazy that I can't remember the name of that style. It'll come to me. Overall it's a cute little summer dress that would look ever so chic with wedge sandals and a kitschy necklace and it should whip up in an afternoon of easy sewing. What's not to love?

--------
And my favorite and the one I vote most likely to make the Best Patterns of 08 list...

1. S2923

Shirt dresses take a little extra work in construction but pay off so well. They've got a forever-chic look and blend professionalism with comfort. Fantastic. This one is an especially good version. I love the flattering princess seam, the pencil and aline skirt options, the buttons that stop a little below the waist (buttonholes are a pain on my machine so the less the better), the graceful back yoke, the gathers, the many sleeve options, and, best of all, the mandarin collar. I think my asian side is showing. The asian side gained from living in asian neighborhoods, not through any bloodline. Sadly my body is pure western european with all the difficult to fit curves that come with it. But back to the shirt dress, I can so see making that up in three or four versions for throwing on for classes next semester. So easy and so chic.

----

So, what was your favorite pattern from this collection? Any you thought should have gotten nixed at the drawing board?

Thursday, March 20, 2008

McCall's 5576 Step-by-Step: Cutting


Now that your pattern is nicely laid out and pinned to the fabric it's time to take a deep breath and cut!  No going back now!

First, take a moment to look over your layout before cutting.  Are all of your pieces perfectly on grain?  Are you missing anything?  All the pieces facing the right way?  If so, great, let's go!
Although I normally use a rotary cutter, for this pattern I pulled out my trusty scissors just to ensure I still knew how to use them.  It was also a good reminder for why I prefer my rotary cutter.  Make sure you're using nice sharp scissors reserved for cutting fabric.  If your scissors have nicks and rough edges they can snag your fabric and ruin it before you have a chance to use it.  I've written "Sewing Scissors DO NOT USE" all over mine to help tell them apart from our regular scissors.  

Start with a long, mostly straight edge (the hemline is good) and cut with long, clean, controlled strokes.  Don't hurry!  Cut on the OUTSIDE of the black cutting line.  Again, go slow, there's no reason to rush.  Enjoy the cutting process and the sound of the scissors.  Be careful not to lift the fabric up any more than is necessary to fit the bottom blade under it.  This is one of the many reasons I love my rotary cutter - no lifting of the fabric.  However the mats and blades are relatively expensive so most beginners have to serve some time cutting out their patterns the way their grandmothers did.  It builds character.

When you get to a corner (such as when you move from cutting the hem to the side seam) cut a little past the turn then come back and start cutting up the side.  This helps keep everything neat and sharp.  

When you're cutting along a curve, especially a sharper one like you find at the neckline, continue with the long cuts but pivoting the scissors as you cut to follow the curve.  What you DON'T want to do is take little snips.  It's far too easy for those to turn out a jagged edge.  

After the piece is cut out take the time to mark it then and there.  (Lesson on marking coming soon.)  After marking the piece, leave it there if possible and move on to the next piece.  Picking it up can shift the fabric and mean a minute or two of resmoothing before cutting the next piece.  Unfortunately my cutting space is so small that I can only cut one large piece at a time so I do pick up just cut pieces, fold them a time or two, and put them in a neat pile off to the side.  Basically, do what works for you but do it knowing the reasons and (potential) consequences.  

Continue cutting out the various pieces until you're finished.  Now take a moment and look over the instruction sheet to make sure you've got everything you need.  More than once I've thought I was finished when I'd only cut out one sleeve or forgotten a facing or some other thing like that.  Double checking can cut down on a lot of frustration.  Now you're ready to sew!

Wednesday, March 19, 2008

McCall's 5576 Step-by-Step: Pinning the Pattern Pieces to the Fabric

Now it's time to pin the pattern pieces to the fabric.  This is an important step and well worth doing carefully because if you mess this up there's not much that can be done.  No pressure, though.  :)
First look over the pattern layout in the pattern instructions and take a moment to recheck which pieces you'll need and how many times you cut each.  Now lay down your first piece according to the instructions.  Don't pin it yet!

Find the grainline on the pattern piece.  Unless the piece is on the fold (we'll get to that in a moment) it's the long line with an arrow at either end.  Measure from it to the selvage or fold (whichever is closer) at several points.  Is it the same distance from the selvage/fold at each point?  If not (and it's probably not) then adjust it until it is.  Now put two pins in along the grainline.  If you skip this step you're likely to cut the piece off-grain and that can later cause the piece to hang wrong and try and twist around your body.  If you've ever had a garment whose side seam wanted to be in the front then you know what a pain it is.  And no, there's no way to really make an off grain piece behave like it should.  So don't cut off grain!

Now smooth out the pattern with your hand, making sure it and the fabric are flat.  Pin around the edges of the fabric, putting the pins parallel to the cutting line and about 1/2" in.  I put pins ever 6 or 7 inches on long straight edges and every few inches on more curved edges.

If you look at the picture you'll notice how I pin the corners.  Rather than pinning parallel there I put them at an angle.  It seems to hold the fabric better.  Make sure all your corners have pins as this will help you a lot when you get to cutting.

------------
Excursus: Pinning patterns that go on a fold.

Placing and pinning a pattern piece that goes on a fold is, in some ways, easier than other, non-fold, pieces.  Pieces that go on a fold are indicated by, instead of a grain line with arrows on both ends (or on one end in some cases), a line about 1 inch in from one side with arrows pointing to the edge.  That's the side you'll want to put on the fold.  I just lay it down and adjust it until the pattern is right on the fold all the way down and then pin it.  You can measure the distance from fold to grainline if you really want (I usually don't) but if you just line up the pattern edge with the fold then you should be fine.  And that's it!  Easy! 
------------

Repeat this for the rest of the pieces or at least as many as you can fit onto your cutting surface. Now you're ready to cut!

Saturday, March 15, 2008

McCall's 5576 Step-by-Step: Tracing and Getting the Fabric Ready

I'm a half-and-half tracer - half the time I do it, the other half I just use the pattern directly.  So why trace at all, especially when you can get patterns at $1.99 on sale?  Lots of reasons but I do it for the fit and durability.  I trace onto the cheapest interfacing I can get at Joann's and because it's fabric-like I can sew it up, pin it, and generally assemble the pieces as though they're fabric to check for fit.  You'll see below how I did that with this pattern.  It's also great for doing modifications - I can draw all over with my colored pencils taking in some here or adding something there and it won't tear like the cheap tissue pattern.  Also it means if I need a different size then I can get it, even if the pattern's out of print.  This is the big one.  So there's a bit of an apologetic for tracing.  With that done, let's get onto the dress!

Tracing the Pattern
(1) Gather the Materials
- Pattern
- Something to trace onto (I used non-fusible interfacing, 99c a yard)
- Dark colored pencils
- Ruler

(2) Unfold pattern, find each piece needed, and trace over your size with a bright pencil.  It'll make the next step far easier.

(3) Lay the tracing material over the first pattern piece, pin the two layers together or use a heavy object to keep them together (I use the ruler) and trace the pattern.  Make sure to include cutting lines, notches, and all triangles and circles.  Label with pattern piece, pattern number, and the size you cut out.  Repeat for all other pieces needed.

(4) Pinfit.  Pin the pattern pieces together as they'll go in the final product.  Don't bother with facings or hems unless they're vital.  You're just trying to get an idea of how the fit is on you.  Put it on and see how it fits - is anything too tight?  Too loose?  How's the fit in the shoulder area?  Yes, it's hard to do this with only half a pattern but soon you'll be a pro.


Getting the Fabric Ready
(1) Look at the pattern layout carefully.  Look again.  It's not the ONLY way to cut out the pattern but it's a really good place to start.  Unfortunately this dress's layout for sizes 8-14 is HORRIBLE for a new seamstress.  Instead of an easy fold in half like the other sizes it has you fold in one side just enough to fit on the front and back pieces.  That's hard and it takes a lot longer than is fun.  So if you're reading this prior to buying fabric - BUY ACCORDING TO THE 18-22 LAYOUT.  It's just half a yard more (2 5/8 rather than 2 1/8) and worth every inch.  Unfortunately I bought according to the smaller amount so that's what you'll see.

(1b) If you haven't yet, wash the fabric.  Cotton especially has a tendency to shrink in the wash and you want this to happen BEFORE you've spent hours cutting and sewing.  Wash it on the hottest setting it'll take and, if your cotton is strongly colored, don't put lighter colored stuff in with it.  Dye always bleeds the worse the first couple washes.  

(2) Prep the fabric for laying out.  "True" the grain by taking a snip half an inch down from one edge, cutting far enough in to get past the tightly woven selvage.  Now rip along that cut.  Yes, you read right.  Cottons rip wonderfully along their grain line and it's kinda fun.  Now the top edge should be perfectly perpendicular to the selvages.  Lay it out along a grid to make sure.  If not tug the fabric into shape.

(3) Fold the fabric according to layout instructions
(3a) If you're following the 18-22 layout then fold the fabric in half length wise.  Pin along the selvage ever 6 or so inches to keep it all together, especially if you're cutting on a table smaller than the fabric length
(3b) I bought according to the 8-16 layout so I had to do this the hard way.  First I measured the widest part of the front and back pieces.  This plus half an inch (just in case) is how much I need to fold over from one edge.  The magic number for my size (12 tapering to 14 at the hips) was 11.5 inches.  I folded then measured at three different spots to make sure it was all folded evenly.  Of course it wasn't.  Fold and measure again.  And again.  This is why that extra 1/2 yard would have been a great investment.


(4) If your cutting surface is shorter than your fabric (and mine usually is) then there's a danger of the fabric getting stretched off grain as it hangs off the edge of the table.  This is a slight to moderate risk for firmly woven cottons and a guarantee for looser wovens like chiffon and some satins.  I just take the bit that would hang over the edge and fold it up to sit on the end of my table.  True, it makes my small cutting area even smaller but it's better than dealing with a skewed grain.  Trust me on that one.

Now you're ready to pin the pattern pieces on!  You're doing great!


Friday, March 14, 2008

McCall's 5576 day 1

I have four classes sketched out so far - an introduction to the machine, first pattern (a robe), introduction to zippers and sleeves and darts, and a skirt fitting class. I'm considering using McCall's 5576 for the intro to zippers et al class and figured that maybe, just maybe I should make up the pattern myself to see if it would work for newbies. Plus I get a couple dresses out of the bargan. Score. :) So the making of the dress, day one...


I bought some snazy (and, for Joann's, expensive) black quilting cotton with silver sparkles. I keep hoping I didn't make a mistake - it was more than I wanted to pay and it's pretty stiff - certainly not the nice soft stuff I'd recomend to students. But it looks really fantastically sharp. Part of the trepidation is knowing that I can't frankenpattern or modify this pattern like I normally would. The standard saves I'd typically make really don't help the students see what their dress will look like. Though, if it really looks that bad, it could be an example of a creative save. But hopefully it'll work out fine. For my trial version, though, I'm going to use a much softer cotton (also from my little local J's) in a beautiful black and green geometric print that I love and which has been aging a year in my stash but has waited until now to tell me what it wants to be. The print should help hide errors, as well.

Back to the black fabric, it came home and I wanted to wash it immediately but we just did laundry yesterday and I'm not spending the 75c our apartment washers cost for one length of fabric. So I googled how to wash clothes in the bathtub. Ask and you shall receive! I so love all things Wiki.


After washing the fabric I traced the pattern. I'm a very slow tracer. An hour and a half later I finished and pinfitted the traced pieces - looks good! Tomorrow I hope to cut and start on the actual sewing. Tonight I'm tired and I know better than to cut while tired - very odd things happen. So avoiding that. :)

Tuesday, March 04, 2008

New Class to Suck My Time!


For my internship I have to teach at the lay school my seminary hosts. Makes sense. So I go in to interview for a position and the director asks what class I'd like to teach. I reach for the list of standard classes on his desk and he pulls it away and says, "no, not what class of our normal roster you'd like to teach, what class, if you could design one, would you like?" Well, it just so happens I'd been dreaming. So I describe this class looking at the New Testament cannon and the various criticisms it's come under recently from everything from the Gospel of Judas to Bart Eerhmans' questions about scribal corruptions and next thing I know I'm down to teach The New Testament Cannon: Do We Really Have God's Word? next semester. Over the next few months I need to get together either a textbook or selected readings, a schedule, and a syllabus for this brand new class. Eeep! And, at the same time, very, very exciting!

In other news there's no way I can teach that class, take 4 classes myself, and still put in the hours they need me at work. So something has to give and it looks like work is the one that will. Financially things work out if I just bring in a couple hundred a month and so I began thinking ... is this the year to finally do what I've been wanting to do and start teaching sewing classes? There's been a bit of a convergence of stars here with more people living near campus, a woman donating new sewing machines, an increase in interest among those I've talked to, and our apartment is just right for a class of 6 people and sewing machines. It's not spacious but, well, neither are the places that my students will be sewing in. First on the docket - get caught up with classes so I can dream without guilt! But after that I need to do test runs of the class projects, get tables for sewing on, rearrange the living room, advertise, and, I'm sure, so much more. But I'm excited and, after a string of jobs that have left me more worn out and discouraged than anything else, I don't mind a bit.

Tuesday, February 05, 2008

Mending and Theology

Beautiful and thought-provoking quote from NPR

"Mending doesn't say, "This never happened." It says instead, as I believe the Christian cross does, "Something or someone was surely broken here, but with God's grace it will rise to new life." So too my old pajamas, the fence around the garden, the friendship torn by misunderstanding, a country being ripped apart by economic and social inequity and a global divide of enormous proportions — they all need mending.

I'm starting with the pajamas."

By Susan Cooke Kittredge

Monday, February 04, 2008

New Book (?) on the horizon?


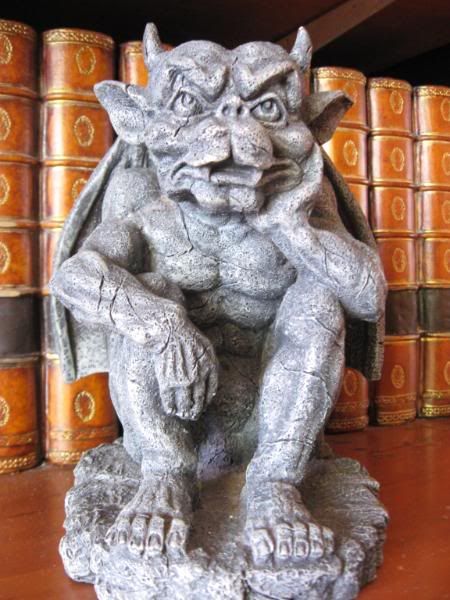
Stone gargoyle in Belle's Library in Walt Disney World

Last Christmas my aunt gifted DH and I with a gift to the World - Walt Disney World, that is. With the stipulation that we go at the same time as her and my immediate family. Fortunately they're all only mildly crazy (hey, you knew I got it from somewhere) and a lot of fun to vacation with so we took her up on the offer in a millisecond. As Christmas presents for everyone I put together a pocket sized scavenger-hunt extrodinaire for the World, including the standard "find a stone monkey statue" stuff, points for going on the rides, pressed pennies to hunt down, pages for a daily schedule, abbreviated menus for all the counter service places in the parks, and a full section of logic puzzles, word searches, and games to keep everyone occupied when the lines got long. It was a huge hit.

Since I've sunk all that time and work into it I began to wonder - would other people be interested in this little booklet? Would it be possible to publish this hunt and both share the fun and get a little back from all my research? I'm in the first stages of finding out. After investigating two of the new online self-publishing places, blurb.com and lulu.com, the latter really had the size and prices I was looking for. Check one. So I uploaded my hunt to their site and ... oops, I was under the minimum number of pages. I thought that was a little odd since I had 73 pages and they wanted a minimum of 40 - but who knows how these things are calculated. Added some more games and puzzles, uploaded and ... drat. In order to get my booklets for my family to the right size to carry around - half pages (5.5"x4.25") - I'd set MS Word to print two pages per sheet. So Lulu was showing my stuff just the way Word was told to print it, only with everything shrunk beyond readability to fit onto the smallest size booklet they offer. D'oh. Which, yes, means that they thought I had half the pages that I do, what with the two-per-page and all. So they calculate their pages the same way everyone else does. That makes sense.

So now I'm messing with MS Word and trying to get everything to fit on the newly sized paper I'm forcing it to think it's using. You'd THINK that once everything was standardized to fit onto that original half sheet that just resizing the paper to a true half-sheet size would have everything fitting the same as always. You'd think. Sadly I now have another 7 or so hours of strictly formatting to mess with before I can even think of publishing. Oh well. Gives me time to look into copywrite issues, marketing, and all that jazz. If I'm going to sink that many more hours into this then I DO want it to pay me back, litterally. :)

So that's what's happening over in our little apartment. I've got more just randomness about sewing classes, a possible move, and current sewing stuff to blog about next time. For now I've dawdled enough messing with the Scavenger Hunt, time to hit that there homework with a nice, large stick. Teach it to mess with me. :)

Saturday, February 02, 2008

Randomness

So far behind in critiquing the latest pattern collections, my own sewing, and even schoolwork.

But did have time for a quick quiz :)

What Be Your Nerd Type?
Your Result: Literature Nerd
 

Does sitting by a nice cozy fire, with a cup of hot tea/chocolate, and a book you can read for hours even when your eyes grow red and dry and you look sort of scary sitting there with your insomniac appearance? Then you fit this category perfectly! You love the power of the written word and it's eloquence; and you may like to read/write poetry or novels. You contribute to the smart people of today's society, however you can probably be overly-critical of works.

It's okay. I understand.

Drama Nerd
 
Gamer/Computer Nerd
 
Science/Math Nerd
 
Artistic Nerd
 
Anime Nerd
 
Social Nerd
 
Musician
 
What Be Your Nerd Type?
Quizzes for MySpace

Thursday, January 10, 2008

Simplicity's Early Spring Line

It's like Christmas with all the new patterns coming out! So let's look at Simplicity and see what's hot and what's not. Unlike with the McCall's like the problem this time isn't with narrowing down my favorites but with coming up with five I liked. This particular line isn't horrendous, it's just ... eh. The kind that, five minutes after I close the window, I have trouble remembering.

But when has that ever stopped me from commenting?

So let's look at what's hot (or at least lukewarm) and what's not

HOT

#5 - S3510


A very cute, very easy summer dress for the little girl in your life. Ignoring that red and white item, isn't that green dress one that just looks like daisies and long summer days and lime pop-sickles from the ice cream man? You could make up a half-dozen incarnations with various fabrics, sleeves, and trims, and no one would be the wiser. Cute, cute.

#4 - 2995


I'm seriously considering holding a sewing class on campus. A sweet lady's been giving new Bernedettes to anyone who asks so I figure that, for once, everyone who wants to learn to sew can without me having to have my own arsenal of machines. If I do then we'll have an intro class (this is called a sewing machine ... this is a needle...), a beginning sewing class using one of the earlier released PR patterns, and then an advance beginners class with this one. Why this pattern? Not because it's terribly fantastic ... but it's got sleeves, a zipper, and two darts, all of which are good second steps along the sewing way and yet they're in a very simple, easy to fit dress. Plus the students should already be familiar with the very slightly different way PR patterns give their yardage requirement and layout instructions so why rock the boat. I also love how there's just such a positive "can do" attitude with these PR patterns. The variations are wonderful and really make it possible that the new sew-ers will come away with a dress they'll actually wear. So it gets on my hot list.

#3 - 3503


The more I look at this the more I like it. I mean it's like a jack-of-all-patterns; there's that cute duro-esque day dress with the kimono sleeves, that hot red cocktail dress that needs a stunner of a necklace, and that glamorous 30s style long dress with the wide shoulders that just screams red carpet. I like it. Not love it but, for this line, like is good enough to get it on the hot list.

#2 - 3502


I LOVE the Grecian goddess version there. I think it needs a drapier fabric and more gathers but the overall idea is beautiful. Not sure I could wear that style but I'd be very willing to try.

#1 - 2996


I love these shirt dresses and I swear I'll get around to making one sometime this year. The blue version is so sleak and chic and I like the 50s vibe the two longer ones are giving off. The pink version's the only one I'm not feeling. Dropped waists and gatered skirts really should be outlawed on anyone over the age of 9. But that's the only misstep in this pattern and and easy one to ignore with the two other skirt option.

---------------------
Top 5 Nots coming up soon!

Friday, January 04, 2008

McCall's Spring Preview - What's Hot, What's Not

Not Hot
Starting out with what's Not because it's just so much more fun that way...

M5578


This dress is giving me bad flashbacks to fourth grade. Baggy top, gathered knit skirt, and buttons in the back? And those horribly placed pockets? Trust me, it wasn't particularly attractive on a fourth grader in the early nineties and it's no better on a grown woman. Worse, actually. I'm pretty certain that this dress is specifically designed to make a woman look her absolute dowdiest. Yes, those longer sleeves are kinda cute. Do yourself and all who look at you a favor and morph them onto a better bodice. The world will thank you.

M5577


The purple line drawing doesn't look so bad ... but that's only if you can tear yourself away from the train wreck of the blue jumper to look. Seriously, could the proportions look any worse? That tiny top with the child-carrying pockets just looks off. Granted, it's the kind of look you can envision seeing during Project Runway ... but it's usually the result of too little sewing time, a bad choice of fabric, and strange materials. We don't have that excuse. If, for some reason, you just HAVE to have a jumper like this then take your cue from the purple girl - wear it with a full shirt, use drapey fabric (maybe even a lush silk knit) and DON'T USE THOSE POCKETS! Put discrete ones in the side seams, if you like but please, by all that's holy, run from those horrible ones. They give all pockets a bad name.

M5588


This one isn't terrible ... it's just not good, either. The proportions with that neckline just seem very, very off. It looks like it's both engulfing and binding the poor model. Not exactly the look I go for when I get dressed each day.

M5565


The absolute, no doubt, unarguable worst of the bunch. It screams Happy Hands at Home in a way that makes one flinch from sewing. It's giving a tiny model thunder thighs. It looks like a maternity outfit made by a sweet aunt who only bought her fabric on sale ... back in the 70s. It's got those horrid thick fabric straps that only show up in bad sewing patterns and those oddly placed buttons that just feel so wrong. From top to bottom it's just so completely ick. Congrats, pattern, you've won top price at worst pattern of the season.

Hot
Moving on to happier grounds, the best of the bunch. Honestly, this was really difficult. There were so many patterns in this batch that I really like and would love to comment on. However, these are the five that I finally settled on as my absolute favorites. Enjoy!

M5576


It's a sack dress that also has shape - beautiful! And I love the use of the silver fabric and the totally mod gems on the green. Just too cute. And how can you not love a pattern that says, under notions, that it requires "purchased plastic or acrylic stones to creatively embellish motifs within the fabric for dress B or front yoke on dress C."

M5575


What a hot little tunic. I've got a similar one that I've been wearing to death over a pair of simple black pants. No leggings for these legs. It's worked really well, I get a number of compliments on it and it really is slimming. I'm not sure how since empire waists and mid-thigh tunics are usually my kriptonite, but it is. I might pick up this top and try and repeat the previous one's success. With a cami underneath - that's a pretty impressive v there.

M5590


This is a basic that NEEDS to be in your collection this year. High waisted pencil skirts are back with a vengeance and this is the perfect template for a lot of very stylish creativity. Added bonus - once you've got this pattern fitted for your figure it's an easy trim away from being a perfectly fitted regular-waist skirt. Since I hate the fitting step I'm all for that.

M5597


Look at that jacket. Look at it! Is that not an instant trip in time to the suits of the 30s and 40s with their small but fantastic details? Despite not having any need for the suit jackets I already have, I'm feeling a need for this one. Just wearing it is instant glamor. A definite must have for my pattern collection.

M5584


There were a lot of great patterns but this one is the one that I fall in love with a little more with each look. It's so retro modern, so over the top glamorous, that I can't stop thinking about it. Logically I shouldn't even consider it - I'm a curvy hour glass that should, by all the rule books, stick with close fitting silhouettes. Yet I keep wanting to float around in a deep olive green satin version of view C with black tulle poking out beneath and thin gold and silver celtic knots embroidered around the top band. I'm very seriously considering making it up for a wedding we're going to tomorrow evening. After all, with as little fitting as this dress has, it can't be all that difficult to make. And it would feel so very glamorous. Maybe with a little black velvet bolero ... I'm sold.

Thursday, January 03, 2008

Still Alive - I think....

So one 150-page group project, one nasty sinus infection, and two trips to families later, I'm back. And deciding that maybe a commitment to a monthly theme is not a good use of this month. Instead I'll just try to get back to posting on a fairly regular basis. Starting tomorrow with a post on McCall's latest patterns and looking at what's hot and what's so not. Hopefully my life will get a little more ordered as I clean up various loose ends that accumulated over the aforementioned events and maybe I'll go back to being a regular blogger. Hey, it's a dream.

Tuesday, December 04, 2007

January's Theme

I'm stuck. I have NO idea what to put up as the options for January's Friday themes. Do you have any ideas?

Just to help guide, my plan for the month is to spend my normal 15 hours a week up at the Church getting the kiddo program whipped into shape, start working on my SWAP, and finish up all the class work that my current professors have so graciously agreed to let me turn in late thanks to missing an entire month with this stupid sinus infection. So that's how I'll be occupying myself. I'll probably offer "swap item of the week" as an option, though we'll see if I can keep up with the bargain there. I'm not the fastest seamstress ... but if I really want to complete the SWAP that's not a bad pace to set, especially with another semester lurking. Anyway, so far that's the only option I have to give you. Do you have any ideas? Hm, maybe creative ethnic dish of the week. Or ... hm. Nope, out of ideas. Time to use yours. :)

Monday, December 03, 2007

Excellent Eggnog

Best. Eggnog. Ever.


Since I've been horrible about updating, I figured I'd give you a bonus sneak peak at our new Friday series on cookies. Or at least the format. Last Saturday we made eggnog, cider, and ginger snaps for a party and all turned out excellent. I was happy since there's usually at least one bomb - but in this case all were good!

Gingersnaps will come this Friday, today I'll show you, step by step, how to make the best eggnog you've ever had in your life. So... let's go!

But first a disclaimer- this recipe comes verbatim from nataliesmom's Amazingly Good Eggnog on allrecipes.com.

Eggnog

Ingredients
* 4 cups milk
* 5 whole cloves
* 1/2 teaspoon vanilla extract
* 1 teaspoon ground cinnamon
* 12 egg yolks
* 1 1/2 cups sugar
* 4 cups light cream
* 2 teaspoons vanilla extract
* 1/2 teaspoon ground nutmeg

Step 1
Combine milk, cloves, 1/2 teaspoon vanilla, and cinnamon in a saucepan, and heat over lowest setting for 5 minutes. Slowly bring milk mixture to a boil.


I took the "slowly" part perhaps a bit too seriously - it took about 20 minutes for me to get the mixture boiling, largely because I was only turning up the heat by about half a degree every five minutes. Next time I'll try to go a little faster.

Step 2
In a large bowl, combine egg yolks and sugar.


Here's my guy separating out the eggs. He was rather fascinated by the patterns the yolks formed in the bowl.

Whisk together until fluffy.


Whisk hot milk mixture slowly into the eggs. Pour mixture into saucepan. Cook over medium heat, stirring constantly for 3 minutes, or until thick. Do not allow mixture to boil. Strain to remove cloves, and let cool for about an hour.


I only removed the cloves I could fish out. So far no one's died from having a clove in their eggnog.

Step 3
Stir in cream, 2 teaspoon vanilla, and nutmeg. Refrigerate overnight before serving.


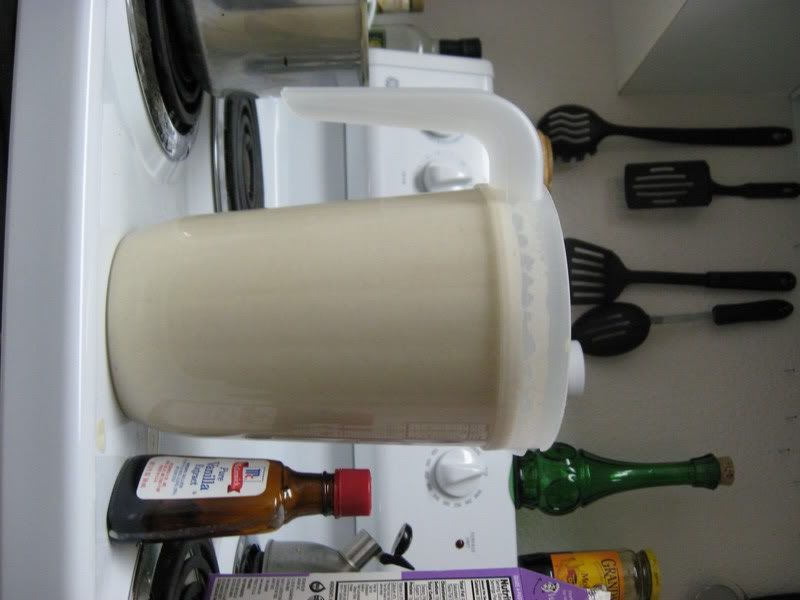
Here's the completed eggnog right before it goes in the fridge. My serving pitcher is far nicer but non-translucent so this picture works best, I figure.

I have to admit I broke into the eggnog while it was still slightly warm just to see how it tasted. Oh, my. It's amazing. Transcendent. Incredible. Even DH who hates store bought eggnog with a passion loves this stuff. It's rich and creamy like ice cream and just so flavorful. It did require a good amount of work (and a lot of time!) but it's worth it!

Monday, November 26, 2007


In honor of next month which, unless we have a sudden rush of votes for another theme, will be A Month of Cookies on this blog. For each of the four weeks of December I'll try out a new cookie recipe (or resurrect an old favorite gingersnap recipe - trust me, it's unbelievably good) and share them, as much as I can, with you.

Anyway, to kick off the month a little early here's a great little site that lets you decorate one of 6 sugar cookies and then send them as an ecard to a friend. The best part? For every cookie sent Betty Crocker donates 10c to Toys for Tots. As a military brat I'm trilled that she chose this particular charity. Such a great cause! So go, decorate, and give a little this afternoon!

Saturday, November 24, 2007

A Thanksgiving Plug

It's nice having family nearby. Instead of dealing with the holiday madness that is the airport, hubby and I drove down to see my aunt in Round Top Texas. That little town (and I do mean little - their population is somewhere around 80, not including dogs) is the most interesting, artsy, laid back place I've ever been. I love it! It's the kind of place where guests are housed in neighbor's guest houses, where the soap is made by someone in your church, and where everyone knows everyone else's pets and days are spent alternating between creating and chatting. It has the feel of someplace so idyllic that it's hard to believe it's real. I highly recommend a visit.

While you're there, make sure you check out the shop my aunt runs, Decadence Down and Antique European Linens. There you'll find hand embroidered linens for your every need. The idea of the shop is to collect beautiful work and pass them on to those who will love and use them. Despite the high price tags, these pieces are meant to be used. While I can't indulge in that ideal at the moment, I do like it. My grandmother had a lovely set of dishes which came to me, fifty years after being bought, in perfect condition because my grandmother never found an occasion "good enough" to use the china for. I was there for her 80th birthday and even then she fussed at me for using the good china. Now that it's come to me I like to break it out for the most unlikely of occasions. If I'm not feeling well a bowl of cereal in the china makes me feel better. I treat the pieces with respect - they don't get beat around like my plastic bowls - but I enjoy them as well. I love how Pandora, owner of the store (and a lovely lady as well), uses tea towels as curtains and used a $2000 antique quilt as a table cloth for our Thanksgiving meal. A wonderful way to make every day just a bit more luxurious.

Tuesday, November 20, 2007

New Simplicity Project Runway Patterns

Judging by the chatter on sewing boards, these poor patterns just aren't getting any love. The general consensus seems to be "that's it?" I understand where the fuss is coming from - when Simplicity announced they were doing PR patterns they never said what aspect of PR they were inspired by. So many hoped that this would be a new version of Hollywood patterns where experienced sewers everywhere could recreate some of the most memorable looks that we saw on our personal silver screens. Or fuzzy with red bleed screen, if you're at my house. We need a new TV. So when, instead of a flowing Uli beach dress, simple but fab Laura Bennet gown, or fabric version of Austin's corn dress, Simplicity instead delivered these patterns ... yeah, frustration was bound to happen. But you know what? I like them. Yes, Simplicity SHOULD have, from the start, showed their hand and said that they were releasing "be your own designer" patterns whose chief tie to PR is the DIY nature of them. But even so... step back, let go of the preconceptions you had, and approach these patterns as what they are - designs made specifically for the Craftster type who'll make a dress out of a pillowcase and spare ribbons. The type who use a pattern as a template for their own designs, who'll ask "why can't it be done this way" and attempt a crazy alteration without any formal training or even sewing experience.

Looking at it from that perspective - I submit that these patterns are, if not brilliant, at least very, very, bright. These patterns have a "you can do it!" vibe to them that I LOVE. Granted, that's probably because I have an inner craftster so I am part of their target audience. Still, they're good.


I bought this one last week at the $1.99 sale at Joann's. I love it! Neatest of all, they include a design sheet with a croquis and all the pieces you need to design your own dress for her. It reminds me of my childhood when I'd make outfits for my paper dolls. The instructions look very clear and easy to follow without being condescending. There's also some very nice touches, like how they have you face the underarm part of the sleeveless dress with bias tape instead of the standard fabric facing. I also love the inclusion of pockets. I love how this dress could be made up as a first project and worn out that evening. I've never gone for the standard beginner projects of pillowcases, pj bottoms, and the like. My first sewing project was my graduation dress for HS. It had darts and a zipper. I didn't know how to do either but, well, I learned. Anything easier and I wouldn't have cared enough to try. So for those with my learning style this dress is fantastic.


I was severely tempted to buy this one as well, though I managed to resist. Those front pleats are just too much of a 'what not to wear' on me. Still, cute design. Fitting, which frustrates more beginners than anything else, I'd bet, is at a minimum with this, as with all the PR patterns. Very, very smart.


I'll admit, I'm less enamored by this one. That square neckline is simply too harsh. But I'm sure someone who likes that look will take this design and run with it. Good for them.


Honestly this who short, boxy jacket trend has me confused. It's mutual, at least... all the short jackets I've tried look equally confused on me. Oh, well. I like how they give various closure options for those of us who can't do a four-step button hole to save our lives. Great idea. And, according to Lucky, these little hobbit jackets are terribly trendy and you need to get one yesterday. Right. I'll stick with classic jackets that keep me warm, thanks.


They remembered our curvy sisters! And they remembered them with a stunner of a pattern. Look at that - just get the fit right and you've got a whole closet full of looks. A satin evening gown, cute summer halter, little black dress, nice print work dress, it's all there. I'd love to see that slit-neck version done with some lovely hand-worked embroidery along the neckline and sleeves. Great dress!


They remembered our future designers as well. Seriously this pattern could win for most versatile. Look at all those options for dressing it up, dressing it down, embellishing, and just generally rocking this pattern. Fantastic!


Overall a nice collection. My ONLY suggestion for improvement would be to replace that second misses dress with a more fitted garment along the lines of the woman's or girl's. We like showing our figure as well! But really, that's it. As a line of blank canvas patterns waiting for a new designer-in-training to own them these patterns all wins, in my judgment. Disagree if you like, but I'm a fan of this line.

Though I do hope that one of the PR4 challenges is to design a wardrobe for Simplicity. I'd love to see what they could do!